

Agenda or planning with all the important activities of the breeding facility. They are identified with a colored border to help you recognize them more quickly.
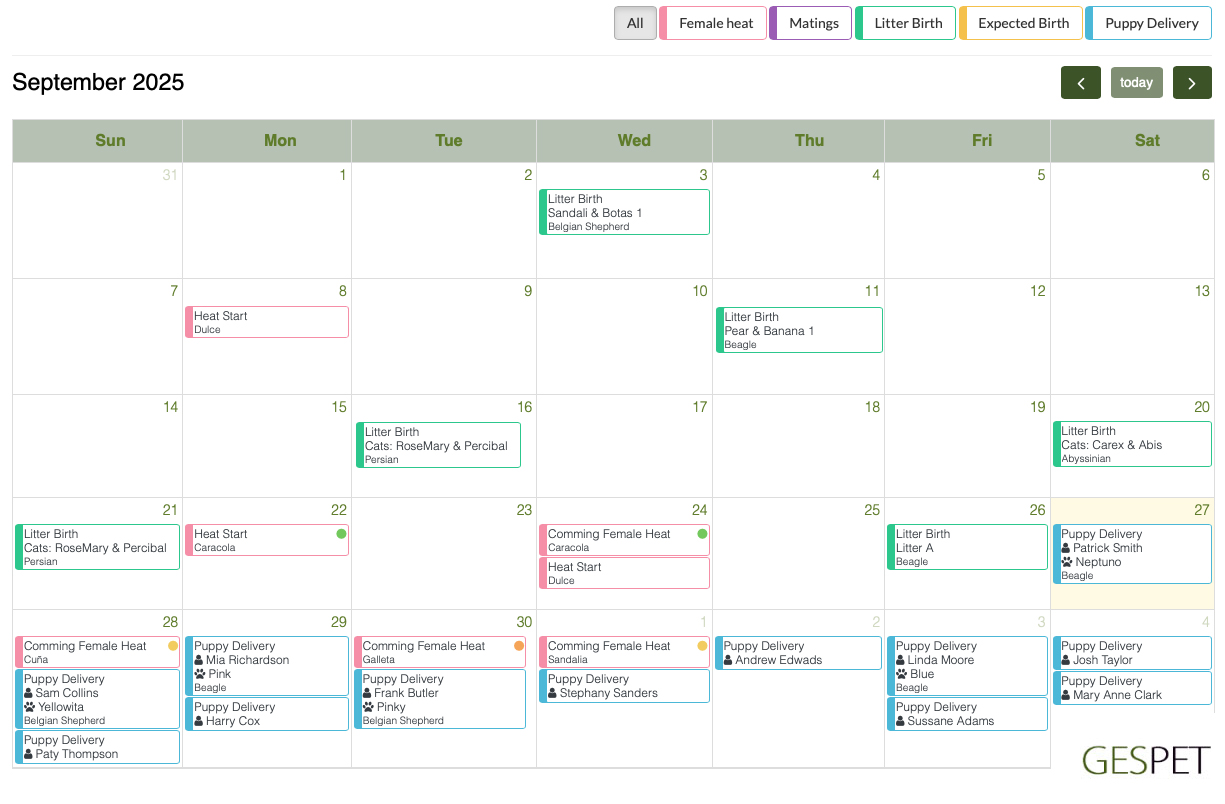
At the top, there is a filter that allows you to select whether you want to see all events or only some, for example only the expected births. You can select several if needed.
You will be able to see the events you have added such as heats, matings, litters, etc. Both current, expected and past events are displayed, so you have a complete overview of your breeding facility at your fingertips.
The events shown in the planning are:
Start date of a heat
End date of a heat
Expected heat (future, has not yet occurred)
Date of mating between two breeders
Expected birth date of a planned or future litter (not yet born)
Actual date of birth. It is not a planned date or a planned litter.
Date already scheduled to deliver a puppy that has been born
To move an event, simply drag and drop it to the desired day.
If you move an event, the rest of the information will not move, it will remain unchanged. For example, if you drag the birth date of a litter one day earlier, the scheduled delivery date of the puppies from that litter will not automatically move forward by 1 day. You are the one who decides whether to change it or not.
List of all animals. You can search using the search bar at the top and sort as you like by clicking on the table's title.
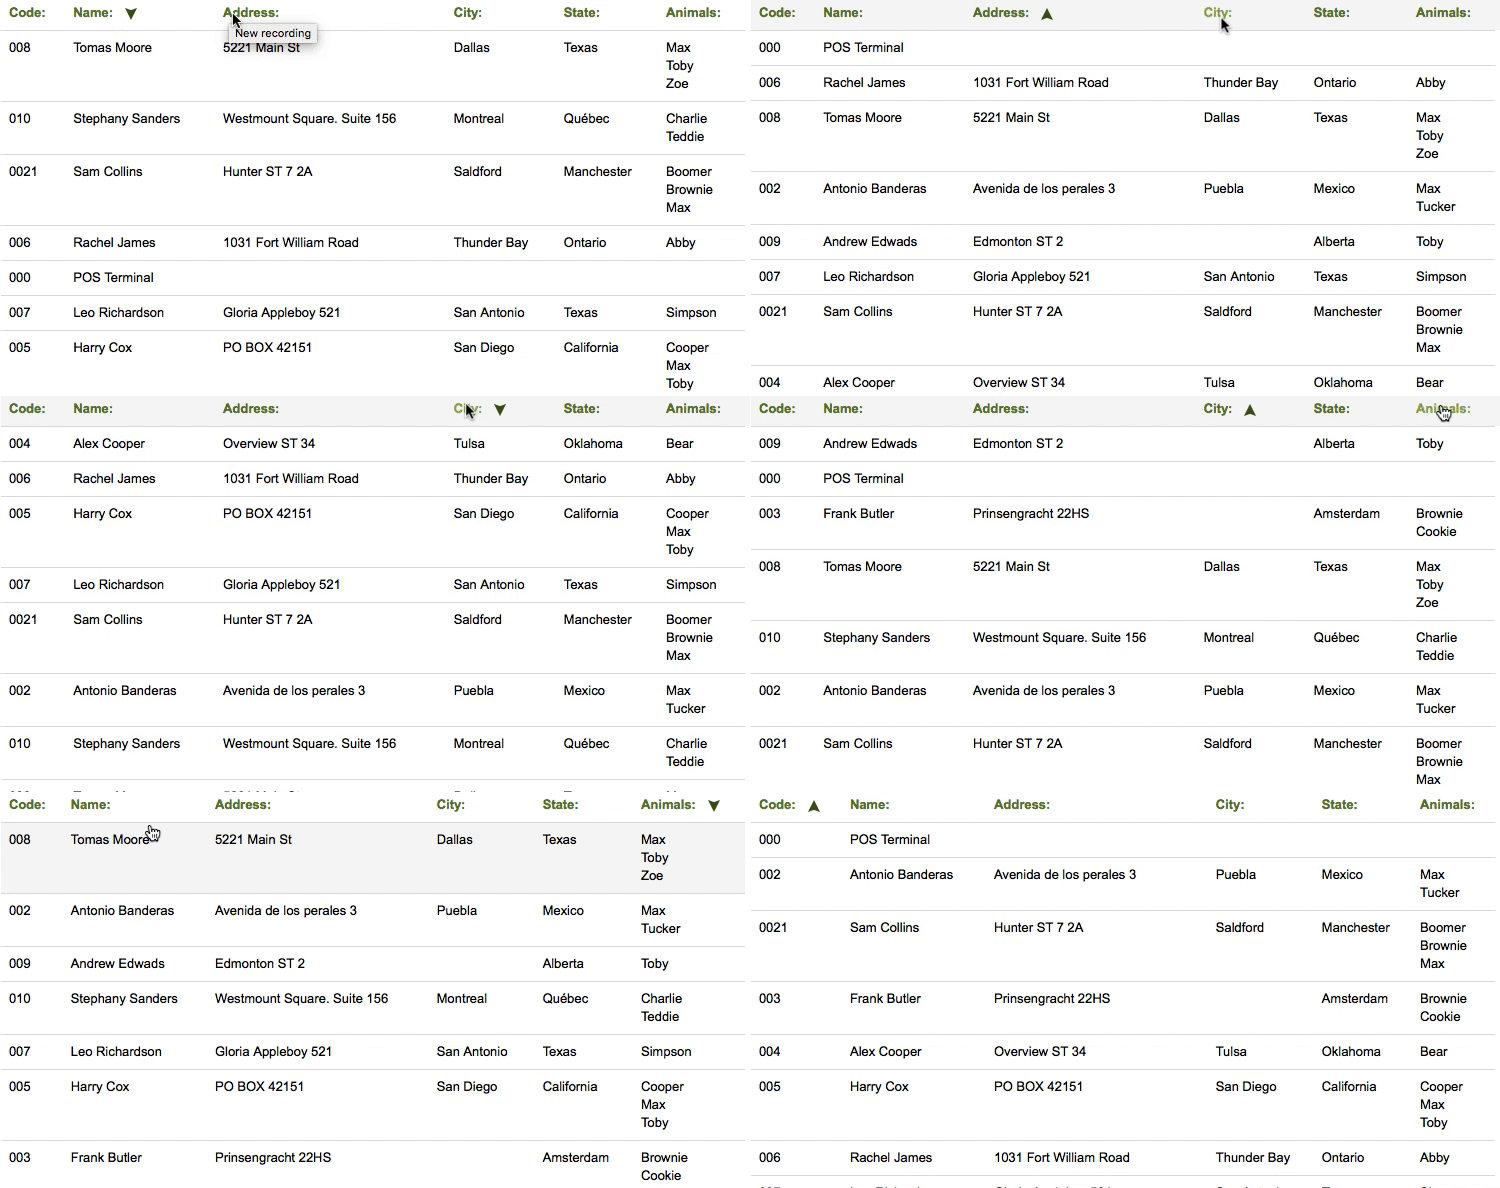
More information on ordering and search engines:
Clic hereClicking on an animal reveals all its information. The "Magic Desk" or summary screen of the animal is displayed, providing comprehensive details and key actions:
There are two buttons at the top:

The first includes quick actions or "shortcuts" and additional options (print a summary sheet with its data, ...)
The second allows you to show/hide the right sidebar menu to expand workspace

At the top, you will find interesting information about that breeder.
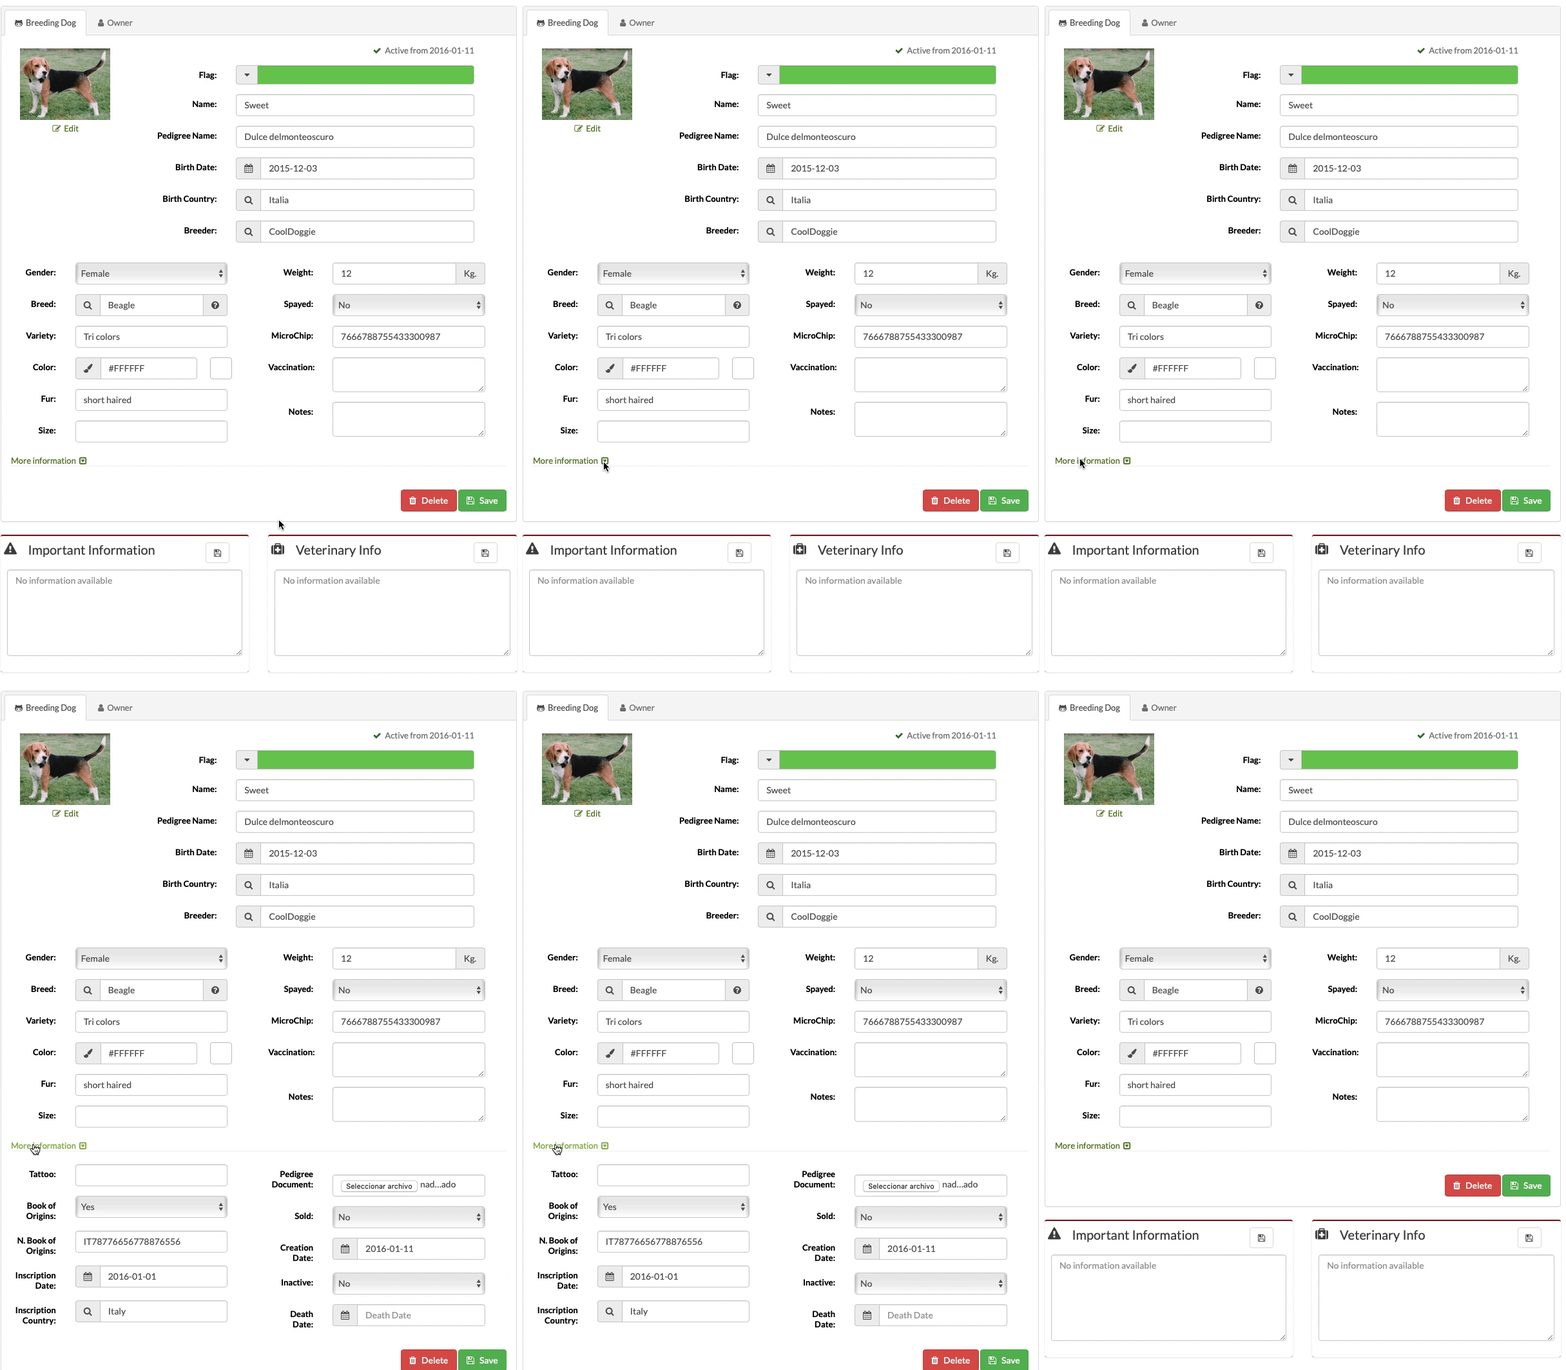
DEACTIVATE AND DELETE
If you have inactive or deceased animals, you can deactivate them. This way, they won't appear when you create a new mating/brood, but their data will remain in your database.
To deactivate them or "mark them as inactive," you just have to select the Low option.
Delete: If you try to delete a breeding animal and the software displays a message indicating that it's not possible because there is referenced data elsewhere, it means that the animal is related to all data such as: heats (if it's a female), matings, is the parent in a Planned Litters or in a Litter, Pedigree, etc.
If you were to delete, for example, a parent of a litter, an error would occur in that litter because information about one of the parents would be missing. For this reason, if there is referenced data, it's not possible to delete an animal.
If you want, you can mark the animal with the "low" status, and this way, it won't appear as a breeder anymore, but you can still consult its records. Or, if you prefer to completely delete that animal, it's necessary to first delete its referenced data.
HIGHLIGHTED INFORMATION
There are specific fields where you can add important or highlighted information:
Important information: Note and check the most important information about the animal. This information is displayed in its Magic Desk and can assist you when dealing with a client: socialization problems, aggressiveness, peculiar behavior, etc.
Veterinary information: Note and check information about the animal's health, treatments to be applied, or data from its usual veterinarian.
Information about the owner associated with this animal.
In the side menu, there are more options available depending on the app you are in:
Documents: You can store and check documents related to that animal, such as contracts, documentation, etc.
Alerts: You can note and check important alerts for an animal, and the application will automatically remind you of them.
Heats: (only for females). List with all the heats of that female
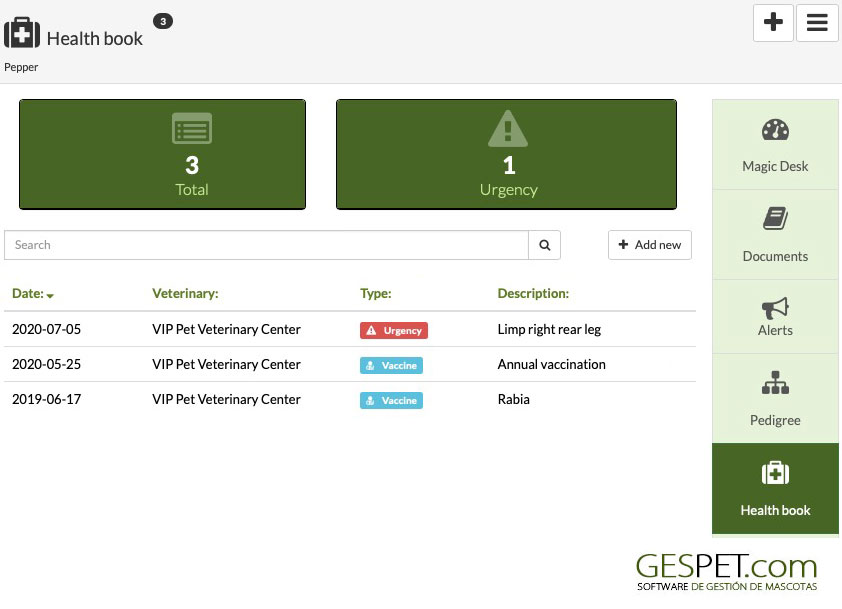
Health Book:
For total control over an animal's health, each one has its health book, where you can note all treatments, vaccines, health problems, etc.
At the top, there is a search bar to quickly locate a record (for example, vaccine)
You can see the summary with the total number of records and the number of urgencies
Records can be sorted by type (vaccine, treatment, urgency, etc.) and identified more quickly because they now include color.
If the associated veterinarian has a flag or color label, a dot with that color appears next to the veterinarian's name for quick identification.
Expense Book:
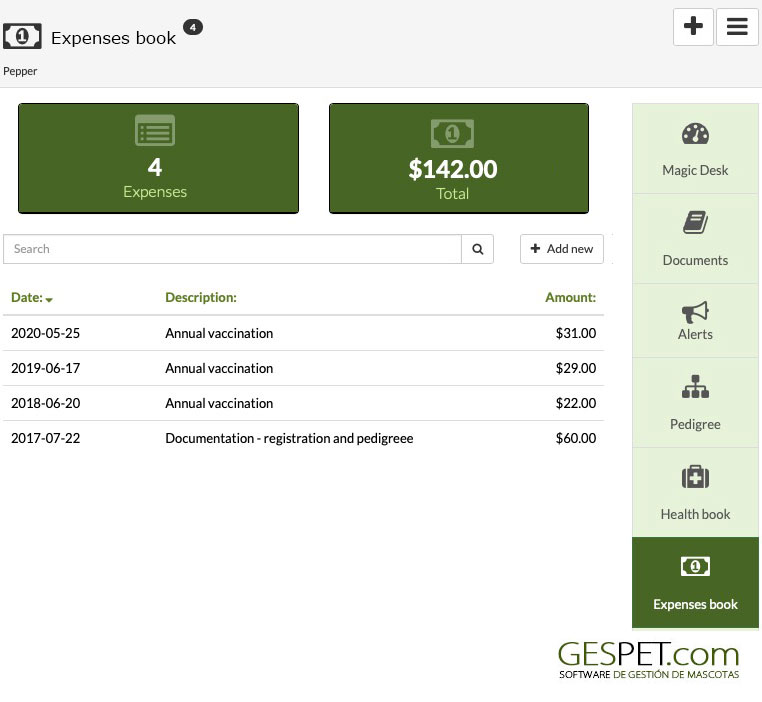
It's possible to note the expenses incurred by this animal. This way, you can know its profitability by comparing the money it has generated with the expenses it has caused.
At the top, there is a search bar to quickly locate an expense (for example, Food)
You can see the summary with the total number of expenses and the total money spent
Matings: Displays a list with all the matings in which this animal has participated, including the details of the mating and its result (for example, "non-covered" litter)
Litters: Displays a list with all the litters in which this animal has participated, including the details of the litter and its status (for example, "Closed" litter)
Planned Litters: Displays a list with all the planned litters with that breeder.
Pedigree: You can store and check the pedigree or genetic line of the animal, including infinite ancestors.
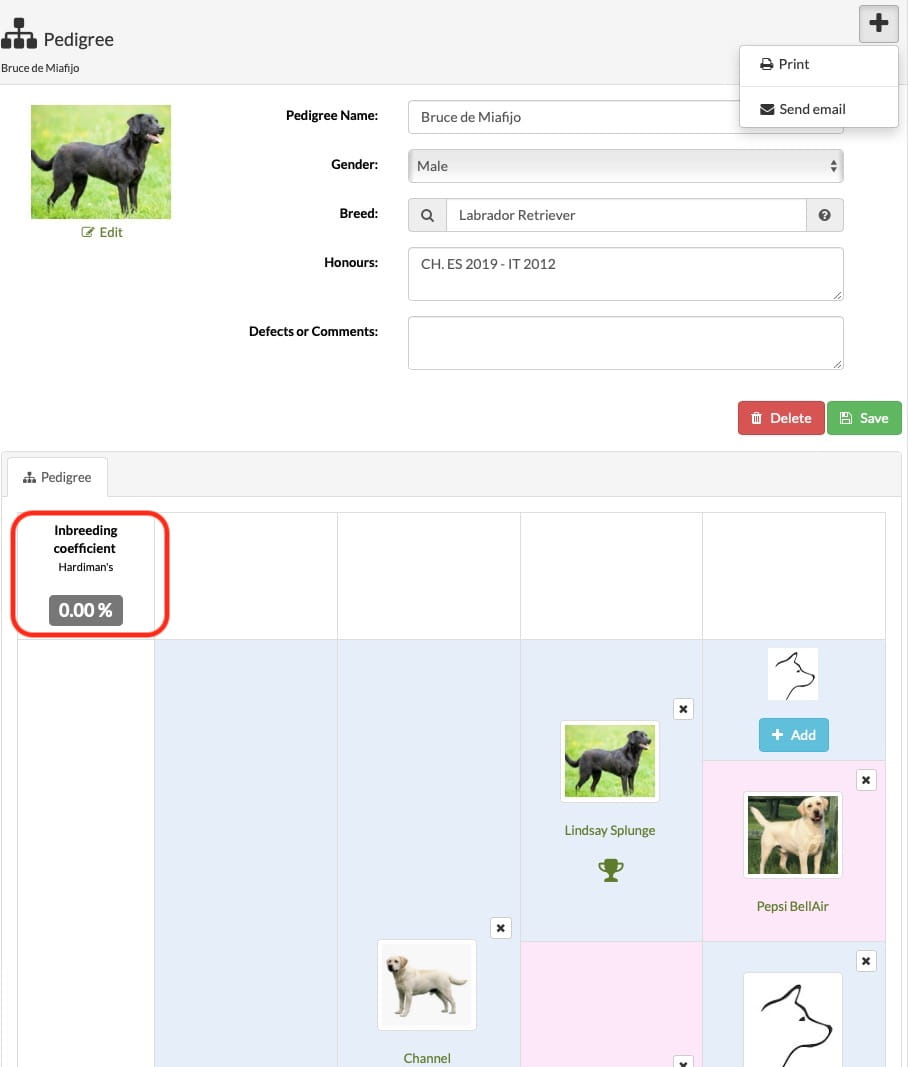
The information at the top (photo, name, race, honors or awards, ..) is what will appear in the pedigrees.
Includes the value of consanguinity. It is calculated using Hardiman's formula and is expressed as a percentage
To easily identify ancestors, males are blue and females pink and are arranged according to a "family tree" scheme or structure.
If an animal has filled in the information about the Honors or Awards, appears the icon: . If there is information about defects or comments, appears the icon:
By clicking on an animal, you can see more information or view his file to edit it.
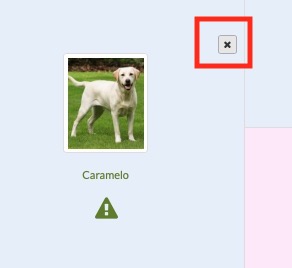
You can also add more animals, clicking on the button Add or remove an animal by clicking on the button X. (The animal is not permanently removed, he is simply disassociated from this pedigree)
Breeding animals have a genetic lineage, their ancestors or parents (parents, grandparents, etc.)
If you want to determine if there is consanguinity, i.e., common ancestors, before mating, you can calculate it with this option.
It's very simple to do:
You must have the female and her genetic lineage added to the software
Also, the male and his genetic lineage
In the Consanguinity Calculator option, select them, and the software will apply Hardiman's formula to determine the consanguinity percentage, if any.
Hardiman's formula is used in population genetics to assess consanguinity and predict the expression of genetic traits in animals, estimating the degree of relatedness or consanguinity between two parents contributing to an individual's offspring.
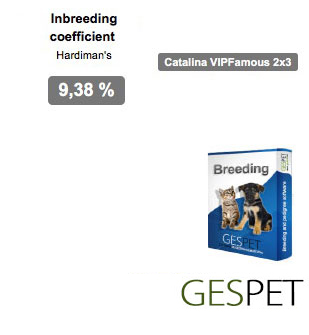
For example, inbreeding is 9,38%. The female "Catalina VIPPFamous" is in the second and third generation.
This option lists all female heats cycles registered with a brief summary of each one.
Upon clicking, more information appears, and you can edit or delete it.
If you have noted a mating during that heat period, the software automatically indicates MATING: YES
Otherwise, it will show MATING: NO
This way, you can quickly see all heats and those in which a mating has occurred.

If you select a female, on her profile, you can also see all her heats by clicking on the Heats option in the right menu.
At the top of the screen, there is a search bar. If you type information and press enter or click the magnifying glass, all matches will appear.
You can sort the list of heats however you want:

More information about searching and sorting data:
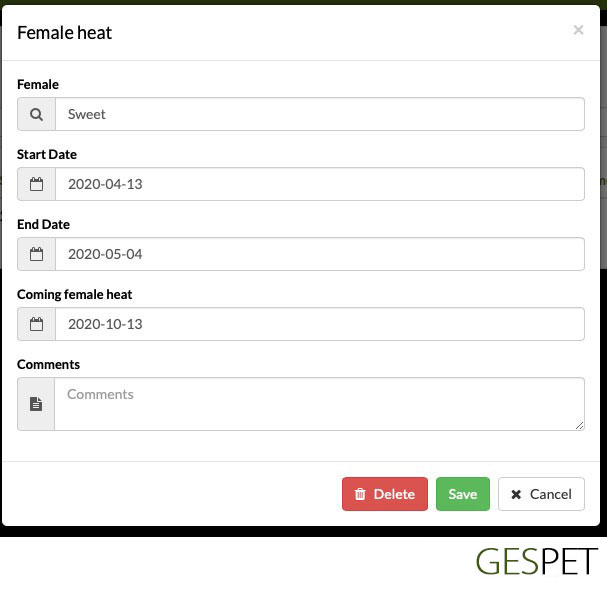
Click hereIn this option, you can also add a new heat by clicking the Add New button
Enter the initial date, and the software automatically calculates the expected end date and also the date of the next expected heat, based on the initial date.
If necessary, you can modify these dates.
This option lists all matings between two registered animals with a brief summary of each one.
Upon clicking, more information appears, and you can edit or delete it.

If you select an animal, on its profile, you can also see all its matings by clicking on the Matings option in the right menu.
At the top of the screen, there is a search bar. If you type information and press enter or click the magnifying glass, all matches will appear.
You can sort the list of matings however you want:

More information about searching and sorting data:
Click hereTo record the mating between two breeding animals, it is only necessary to select them with the search bar. Both must be of the same species and breed.
When selecting a female, her heat periods appear. Select the corresponding heat to associate that during that heat period, a mating has occurred.
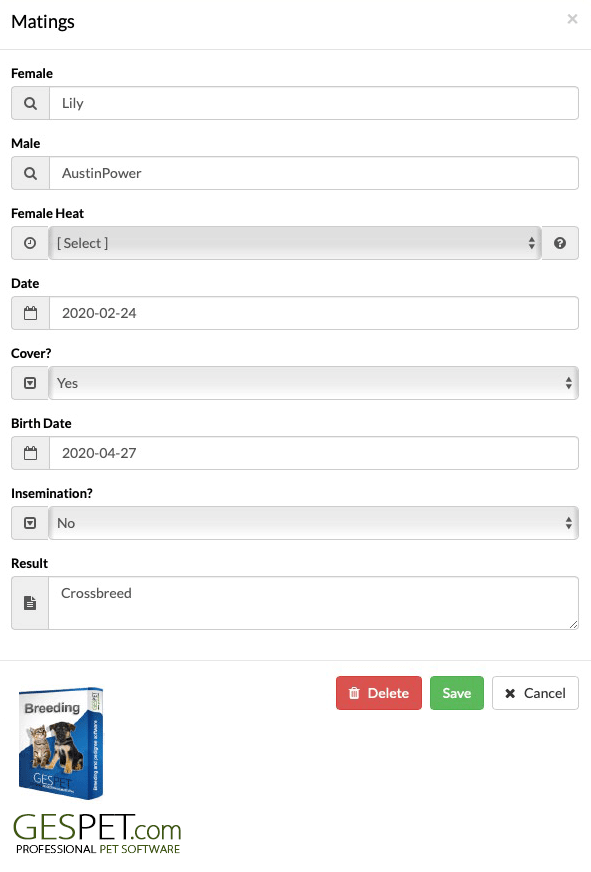
Select the result of the mating: "covered" (pregnant) or "not covered" (not pregnant).
You can also select whether the mating was done through artificial insemination or it was a "natural" mating, and you can add more notes or comments.
You can add as many matings as have occurred during a heat period. For example, 3 matings have been done in that heat, and the result has been:
1 Attempt: not covered (not pregnant)
2 Attempt: not covered (not pregnant)
3 Attempt: covered (pregnant)
From this option, you will see a list with all the bookings.
You can search using the search bar at the top and sort as you like by clicking on the table's title.

More information on ordering and search engines:
Clic hereBooking have different status:

For example:
Customer John Smith made a booking for a White female.
She paid $100 as a deposit to reserve.
Out of the 2 yellow females born, one was assigned to that reservation.
Status:
No deposit: the client has not paid money as a deposit or reservation.
With deposit: the client has paid money as a deposit or reservation.
Puppy assigned: the puppy has been associated with that client.
No puppy assigned: no puppy has been associated with that client yet.
Refunded: Refund or repayment of the deposit money has been made.
Puppy delivered: The puppy has been sold and delivered.
Cancelled: The reservation has been canceled.
By clicking on a booking/reservation, you can edit it:
If there is a puppy associated with that booking, you can disassociate that puppy, making it "free" to be reserved/sold to another client.
You can associate it with another specific puppy or a litter (without selecting a puppy yet).
You can cancel the booking and refund (or credit) the money paid as a deposit/booking.
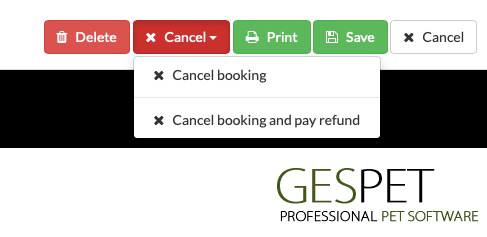
It is also possible to cancel the booking without a refund. In this case, the money remains as a "credit" for that client and can be used to reserve another animal.
If you want to completely delete the record, you can delete it. (It cannot be recovered afterward.)
You can modify the date/time and amount of deposit if applicable.
You can add home delivery for that puppy, selecting the date or modifying the previously scheduled date. **
You can print the booking summary and print any documents you want (contracts, legal documents, etc.)
Documents are configured in the option Tools > Documents and Contracts
> Reservation Type.
More information about planned litters and puppy bookings:
Click here
** This option corresponds to the Transport software. If you do not have this software, the Transport option will appear inactive.
See more information about the Pet transport software:
Click hereList of all invoices you have recorded. If you have multiple business areas, invoices are accessible from all of them, but you can view them collectively or independently (for example, only the Hotel invoices).
A small indicator with the total number of invoices is displayed.
At the top of the screen, there is a search bar. If you enter invoices information and press enter or click on the magnifying glass, all matches will be displayed
You can sort the list of invoices as you need:

More information on ordering and search engines:
Clic hereSales or invoices can have 2 statuses:
Paid: If it's fully paid
Pending: If it's totally or partially unpaid
By clicking on a sale from the list, the details will appear, and you can do additional actions: print it, send it via email, or cancel it.
If you have made a mistake, and you need to "correct" that invoice:
Keep readingReports > Billing
Reports > Invoice pending
Reports > Unpaid invoices
Billling
If the female has been covered during mating (is pregnant), the birth will occur, and the puppies that make up the litter will be born.
There are two types of litters:
Planned litters. The litter is planned, and the female may or may not be pregnant, but the puppies have not been born yet.
Litter. The puppies have already been born
To read more information about planned litters, refer to the previous section.
Already born litters (unplanned) can have two states:
. If all the puppies have already been sold
Or . If not all the puppies have been sold
If you had already added the planned litter and the birth has occurred, you can convert it to a Litter.
The reservations made by customers are retained, and now we can associate them with a puppy that has been born.
To convert this planned litter:
In the View > Planned litters option, select the planned
litter.
Click on the button in the upper right corner and
It no longer appears in the list of planned litters but in the list of litters.
In this option, you can also add new litters. Before doing so, remember to add:
The breeder. In the New > Breeder option. If you are the
breeder, you can
add yourself.
The breeding animals. In the New > Breeding animals
The female's heat. In the New > Heat option or in its
profile
The mating between the two animals. In the New >
Mating option
Now that we have all the data, we are ready to add the litter. Select:
The Breeder
Male and female
The breed is automatically filled in with the breed of the parents
Assign the name you want to the litter. It can be a number, or
the names of the
breeding animals and the date (for example, Brownie and Cookie May 2023),
or whatever
you want.
(If you converted it from a planned litter, this data will already
be filled, but you can modify whatever you want)
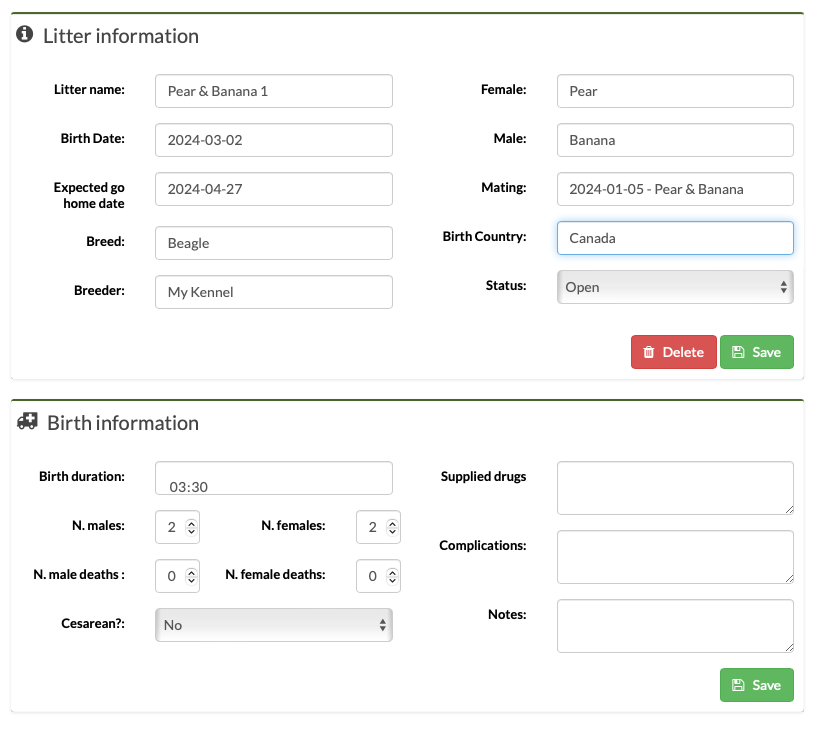
Now select the country and birth date of the litter. You can also include the expected delivery date of the puppies.
Birth details:
Duration of labor
Number of born puppies and number of deaths
More information related to birth: medications, complications... and if you want to add notes or comments.
If you click on a litter, you can view/edit all the information, the genetic line (or pedigree of the puppies), the evolution of weights and measurements of the puppies, the expenses for that litter, and the income it has generated, and much more.
If you click on a litter from the list, its Magic Desk appears, a screen with all the information and many additional options:
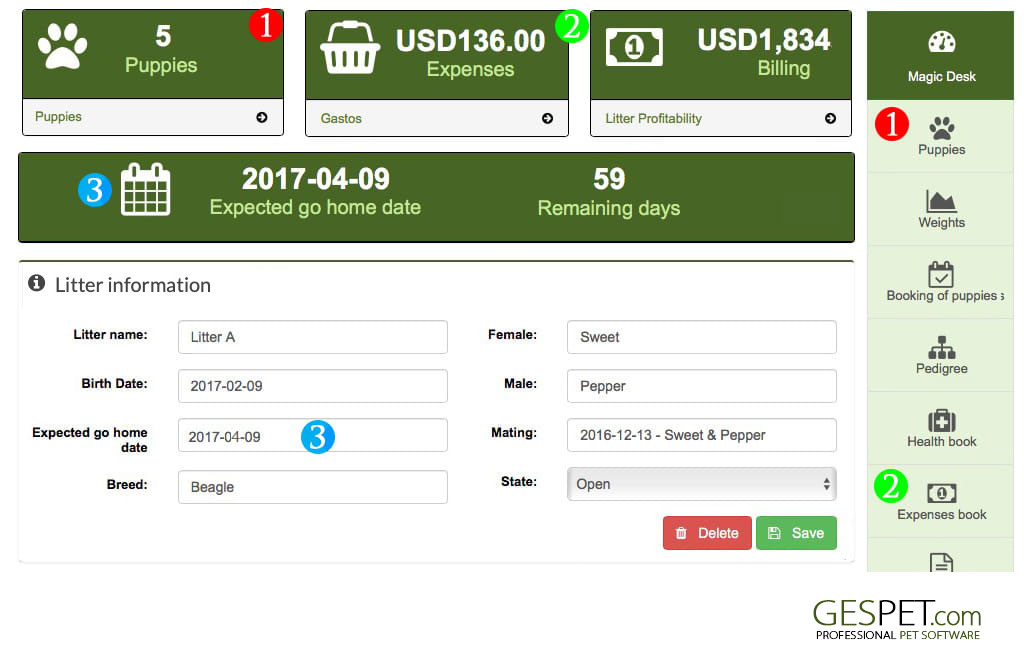
At the top, highlighted information appears:
The number of puppies you have added from the Puppies option. (This is not information about the birth regarding the number of puppies born/deceased).
The expenses you have noted for that litter (for example, veterinary treatments, vaccines for those puppies, feeding for that litter, etc.)
The billing obtained with that litter
The date you have set as the expected delivery date and the number of days remaining
You can view and edit all the information about the litter and the birth
information.
If you make any changes, remember to click the
button to save the changes.
A litter is considered open when there are born puppies from that litter pending to be sold. When the last puppy is sold, the software automatically closes that litter. You can also manually close a litter.
In this option, you can add puppies and check/edit all their information.
By clicking on the button in the upper right corner, you can add new puppies.
You can also search for a puppy using the search bar at the top.
By clicking on one of the puppies, you can check and edit their information (photo, name, size, color, ...)
Puppies have various states:
Available = not reserved or sold
Reserved = there is a reservation for that puppy
With deposit = the customer paid a certain amount of money as a deposit to reserve the puppy
If no deposit = the customer has not paid anything
Sold = already sold
Breeder = you keep it as a breeder in your kennel.
If a puppy has passed away, you can mark it as "Inactive", by clicking on its name and selecting the option: Inactive = yes and the date of death if you want to note it.
If you want to keep a puppy to use as a breeder in your kennel, by clicking on its name, you just have to press the More options > Add to my breeding list button.
If you have the store software, from the Store > New > Sale option, you can also sell puppies and breeders.
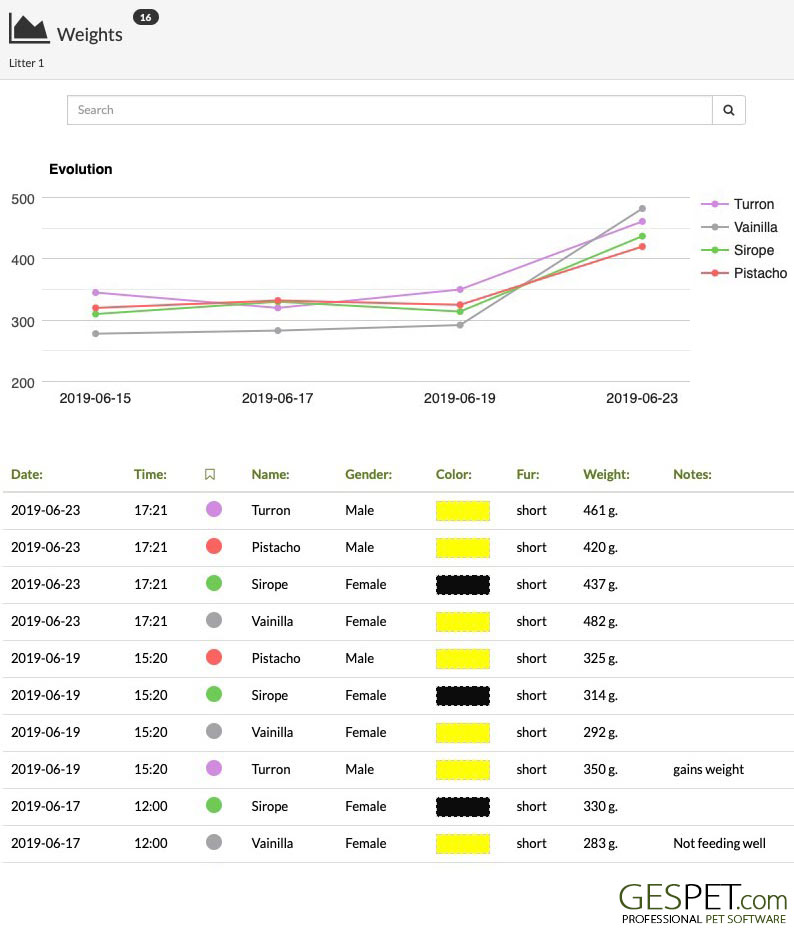
To monitor the development of the puppies, you can add and check their size and weights. This information is displayed in a chart to make it easier to visualize.
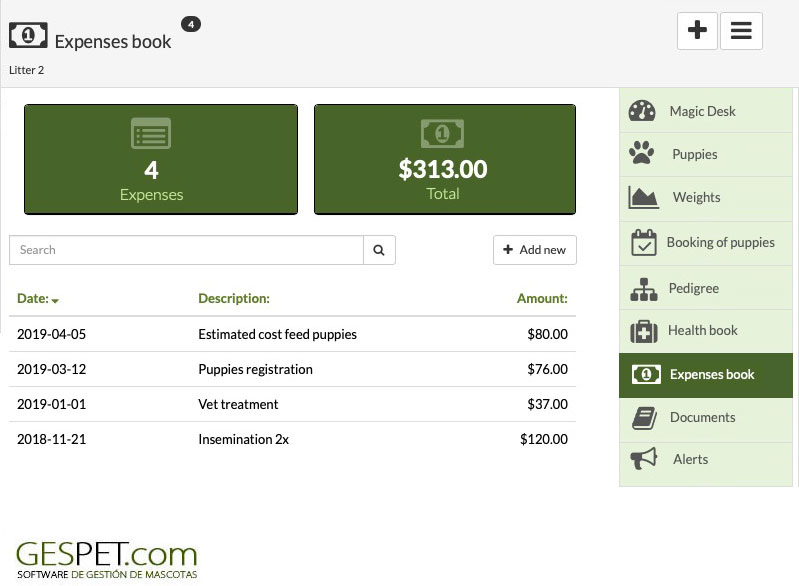
You can record and check the expenses of that litter. This way, it is possible to know the profitability of each litter (Income and expenses).
It includes a search function to quickly locate an expense (e.g., Food).
At the top, there is a summary with the number of expenses and the total money spent on that litter
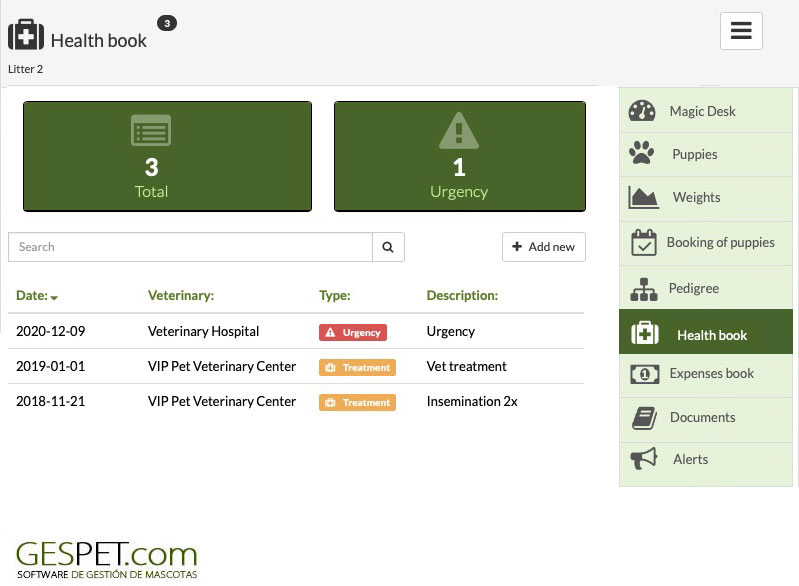
To record and check all the health information of that litter.
It includes a search function to quickly locate a note (e.g., Vaccines).
At the top, there is a summary with the total number of entries and the number of emergencies
You can select the veterinarian, and if they have a flag or color label, a dot with that color appears next to the veterinarian's name for quick identification.
To note and check alerts for that litter.
Includes a search function to quickly locate an alert (e.g., vet appointment or call)
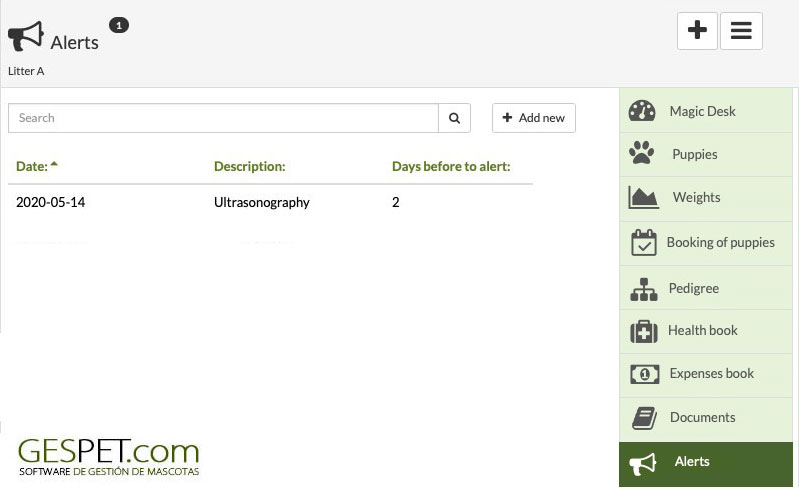
To store and check documents for that litter.
Includes a search function to quickly locate a document (e.g., contract)
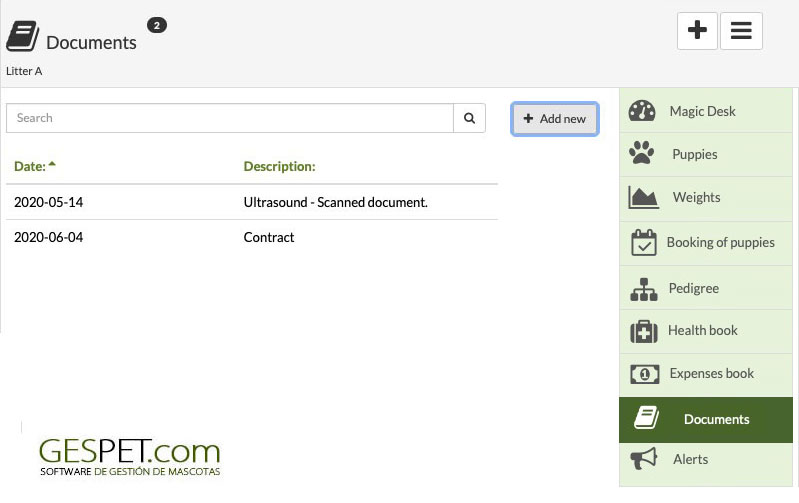
Supported file formats are:
.xls, .xlsx, .doc, .docx, .odt, .ods, .pdf, .rtf, .txt, GoogleDrive Document, and GoogleDrive Spreadsheet
Maximum size 2 MB
List with all the puppy booking made for that litter and payments of money as a deposit or advance, if any.
When the puppies have already been born and recorded in the Puppies option, it is possible to associate a booking with a puppy.
For example:
Customer Ana Maria García made a booking for a yellow female.
By clicking on a booking, you can edit it:
If there is a puppy associated with that booking, you can disassociate that puppy, and thus, it will be "free" to be reserved/sold to another customer
It can be associated with another specific puppy or a litter (without selecting the puppy yet)
The booking can be canceled, and a refund (or credit) of the money paid as a deposit/booking can be made.

It is also possible to cancel the booking and NOT make a refund or credit. In this case, that money will remain as "credit" for that customer and can be used to reserve another animal
If you want to completely delete the record, you can delete it. (It cannot be recovered later)
You can modify the date/time and amount of money of the deposit if any.
You can add home delivery for that puppy, selecting the date or modifying the previously planned date. **
You can print the booking summary and print the documents you want (contracts, legal documents, etc.)
Documents are configured in the Tools > Documents and
Contracts option > Booking type.
More information on planned litters and puppy booking:
Click hereThe pedigree or genetic line of the puppies is generated automatically, taking that of the parents.
At the bottom, there are buttons for:
PRINT THE PEDIGREE
SEND THE PEDIGREE BY EMAIL
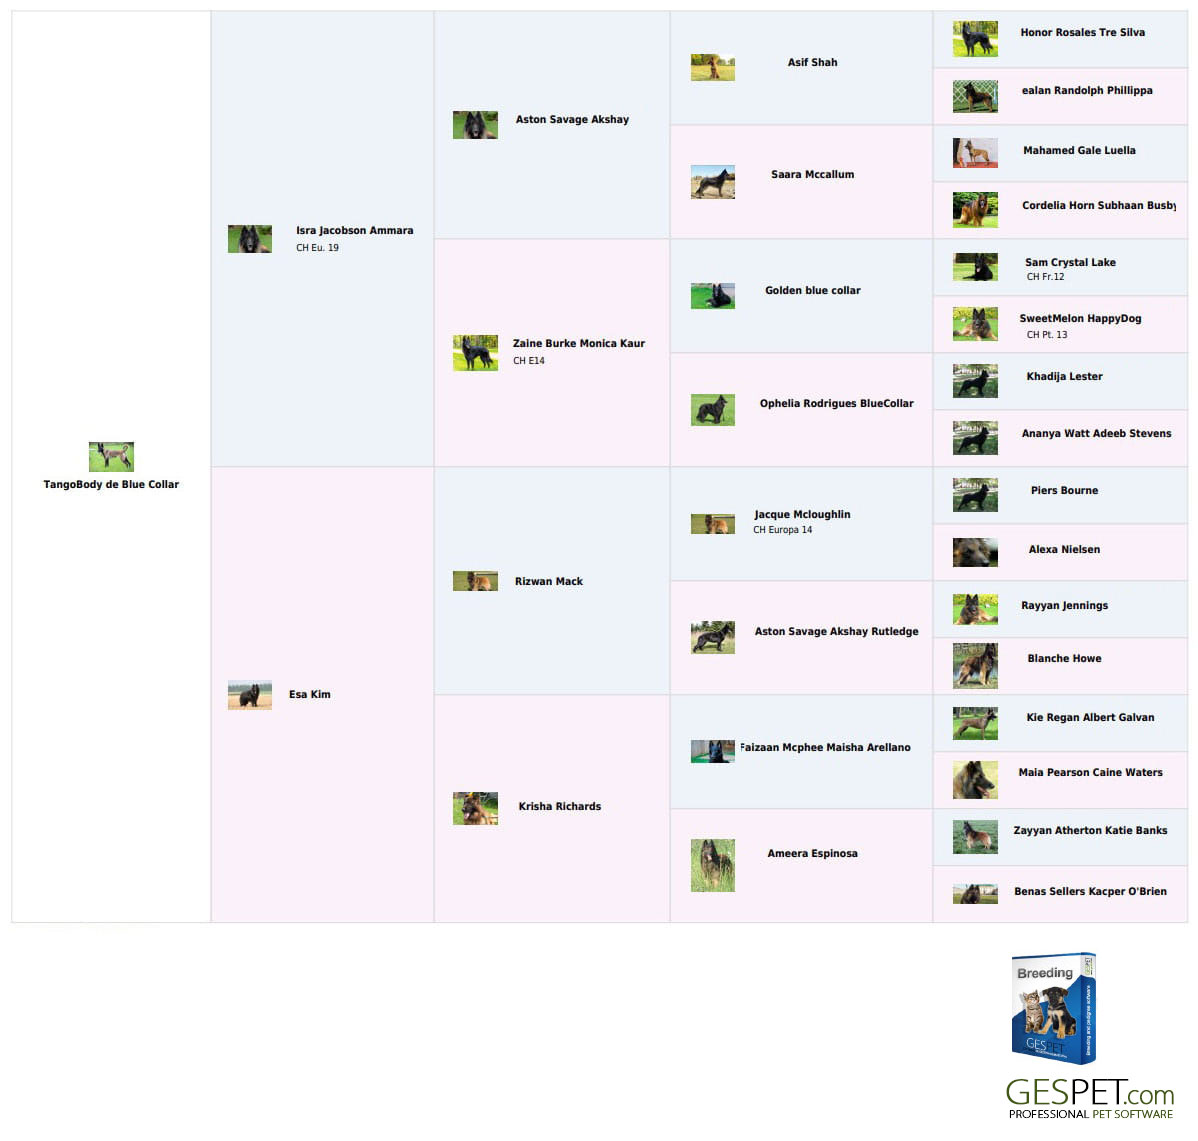
When generating the document for printing/sending by email, it includes the photo, name, and honors (awards), but does NOT include defects or comments.
To identify ancestors more easily, males appear in blue, and females in pink, arranged following a "family tree" scheme.
If an animal has filled in information about the Honors or Awards, the icon will appear: . If there is information about defects or comments, the icon will appear:
By clicking on an animal in the pedigree, you can see more information about it.
If you modify the pedigree of the parents, the change will also be reflected in this pedigree of the puppies.
In the software, you can register planned litters (not yet born), and for these litters,
you can accept reservations and deposits.
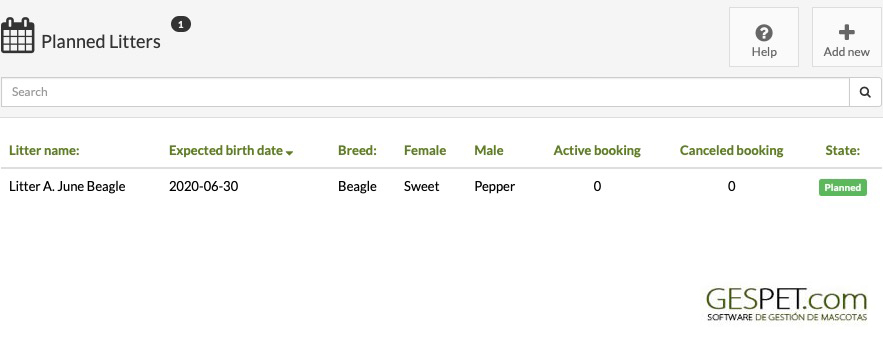
At the top of the screen, there is a search bar. If you enter information and press enter or click on the magnifying glass, all matches will be displayed
You can sort the list as you need:

More information on ordering and search engines:
Clic hereBy clicking on a litter, you can view and edit its information. You can also cancel it by clicking on the Cancel button.
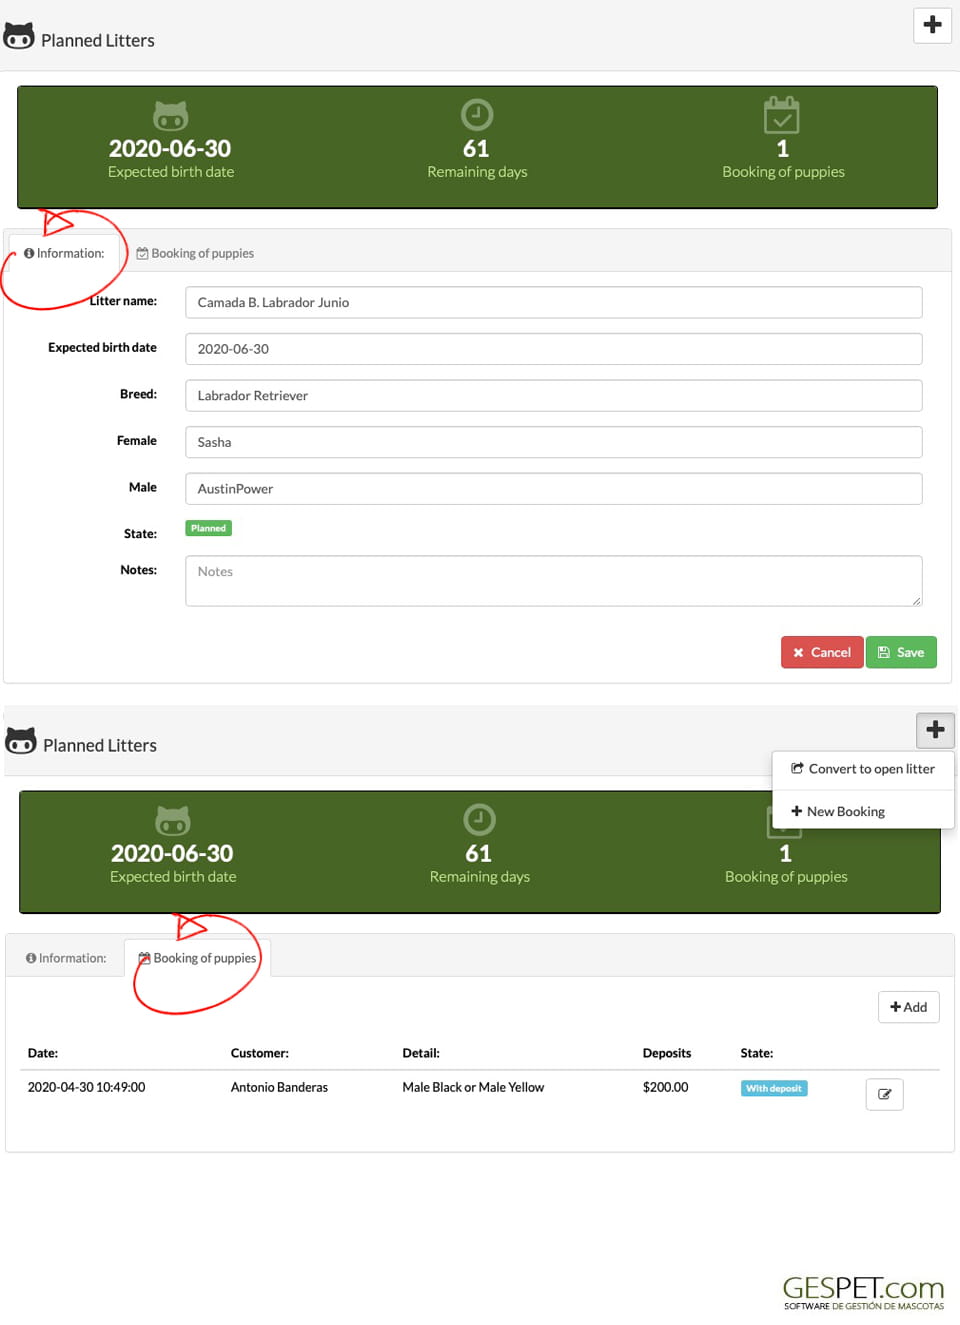
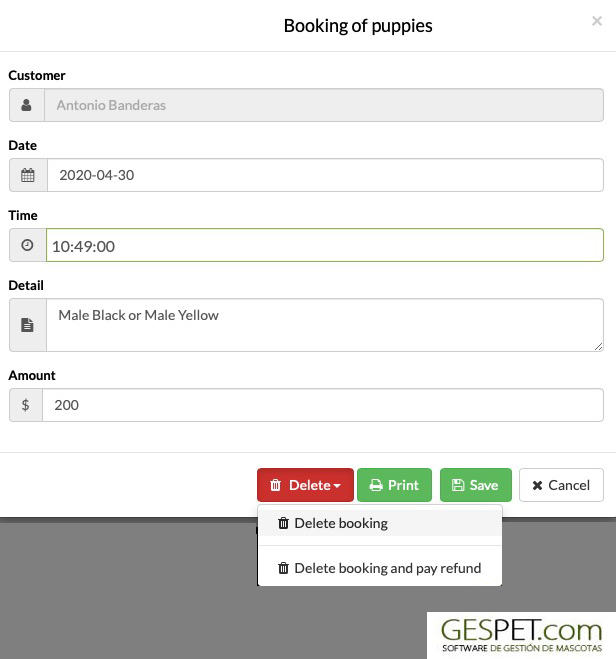
Modify the information
Delete the reservation and make a refund or return the money to the client
Delete the reservation and not refund the money to the client (for example, the client wants to wait for the next litter, and you keep the money they paid)
More information about planned litters and puppy reservations:
Click hereWhen the puppies are born, the planned litter can be converted to an Open (or available) Litter using the + button at the top.
List of all breeder contacts. If you have multiple business areas, suppliers data is accessible from all of them, but contacts are categorized by business area. You can consult them all or by business area (for example, only the vet contacts for hotel).
A small indicator displays the total number of contacts.

At the top of the screen, there is a search bar. If you enter contact information and press enter or click on the magnifying glass, all matches will be displayed
You can sort the list of contacts as you need:

More information on ordering and search engines:
Clic hereTo add contacts, you have two options:
Add them individually (one by one) using the Add option.
Or add multiple contacts at the same time using the Import option.
To add them, use the buttons at the top:
Click the Add New button, fill in the information, and click Save.
(Refer to the New > Customer section for more
information)
Or click the Import button and follow the instructions.
How to import contacts in bulk in the software
Clic hereIf you click on a contact, all the information about them will appear. The Magic Desk is displayed, which is a summary screen or card with all the contact's information.
At the top, there are 2 buttons:
Show/hide the right sidebar menu to expand the workspace
Quick actions or "shortcuts" and Additional actions
Send Summary Sheet by Email
Print Summary Sheet
Add a new purchase made to this supplier
In this option, you can both view and directly modify the information. Remember that if you make any changes, you must click the Save button to save that new information.
Furthermore, using the quick access buttons, you can call or open WhatsApp to chat with them; click on the corresponding icon (phone, WhatsApp, etc.).
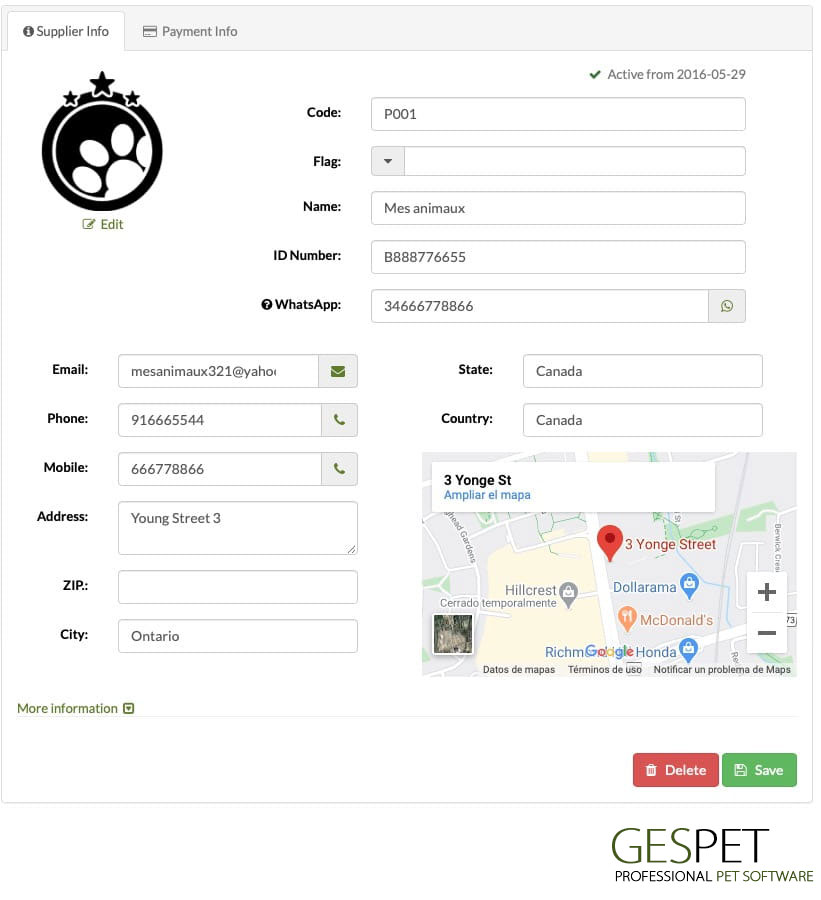
Delete: If the contact has data referenced in other parts of the software, such as orders, purchases, etc., they cannot be deleted directly. Deleting them would cause errors in the rest of the software because those purchases, orders, etc., would no longer be associated with any contact.
For this reason, if you want to delete them, you must first remove the data they have referenced before you can delete them.
If you've been testing the software and entering fictitious data, and now that you've finished the testing phase, you want to delete all the data to start working with the software using real data, we can do it. We can permanently delete all this data from the software. Contact us, and we will assist you.
Deactivate: Our recommendation is that, instead of deleting, you mark them as inactive or "Inactive." This way, you can continue to consult the records of that contact and all their related information.
<>To mark a contact asInactive: In the View > Suppliers
option, select the Contact > in the right sidebar Privacy > Inactive = yes.
If you mark a contact as inactive:
When you check the list of Contacts (View > Veterinary), you'll see that they have the symbol , while the rest have the icon .
In their profile, you'll see "Inactive since date x."
In the side menu, there are more options available depending on the app you are using:
Documents: You can store and access documents related to that supplier, such as contracts, documentation, etc. Supported file types include:
.xls, .xlsx, .doc, .docx, .odt, .ods, .pdf, .rtf, .txt, GoogleDrive Document, and GoogleDrive spreadsheet
Maximum file size: 2 MB
Reminders: You can make and check important reminders for a supplier, and the application will automatically remind you of them.
Privacy: Here, you can manage all information related to privacy/GDPR.
In the software, you can store pedigrees for animals. They don't have to be animals you use as breeders; they can be the ancestors or parents of your breeders if you want to have their pedigrees or genetic lines stored in the software.
For example, Toby is one of your breeders, and his parents are Lola and Poncho. Here you can add Lola (her photo, awards, etc.) and the parents and grandparents of Lola. You can also add Poncho, his parents, and grandparents, and so on, for as many generations as you want. Infinite generations.
You can sort the list as you prefer by clicking on the table title.

From this option, you can also add pedigrees. You can do it in two ways:
1. MASSIVE IMPORT
You can import multiple pedigrees at the same time. Just click on the Import button and follow the process, or if you prefer, you can click on the following link to learn more about importing.
How to Import Pedigrees2. ADD INDIVIDUALLY
By clicking on an animal, its profile and pedigree appear.
AT THE TOP, there is its profile: You can edit its data and photo.
Note: Remember to click Save if you make any changes.
You can also delete the pedigree. If you delete it, it cannot be recovered and will be removed from all pedigrees it appears in.
By clicking on the + button in the upper right corner, you can:
PRINT THE PEDIGREE
SEND THE PEDIGREE BY EMAIL

When generating the document for printing/sending by email, it includes the photo, name, and awards, but does not include defects or comments.
AT THE BOTTOM, the pedigree appears.
In the upper left corner, the percentage of inbreeding appears (The software traverses the genetic line to see common ancestors and the degree. This inbreeding is calculated using Hardiman's formula and is expressed as a percentage. For example, the inbreeding is 10%.)
To identify ancestors more easily, males appear in blue, and females in pink, and they are arranged following a "family tree" structure.
If an animal has filled in information about Awards or Prizes, the trophy icon appears: . If there is information about defects or comments, the icon appears:
The selected animal and the next 4 generations appear.
If you click on one of the animals, you can go to its profile and see its next 4 generations. This way, you can consult and store infinite generations.
To add ancestors, click on one of them, for example, on its father.
If the animal is already in your database, start typing the name, and matches will appear. Select the corresponding animal, and its data will be filled automatically.
If the animal is new, fill in the data.
Click Save.
For example, in the following video, we will add the father of this animal. His name is Capricho, and we had already added him to another pedigree with all his data.
We type Capricho, click Save, and all the data is filled automatically (his information, photo, parents, grandparents, etc.)
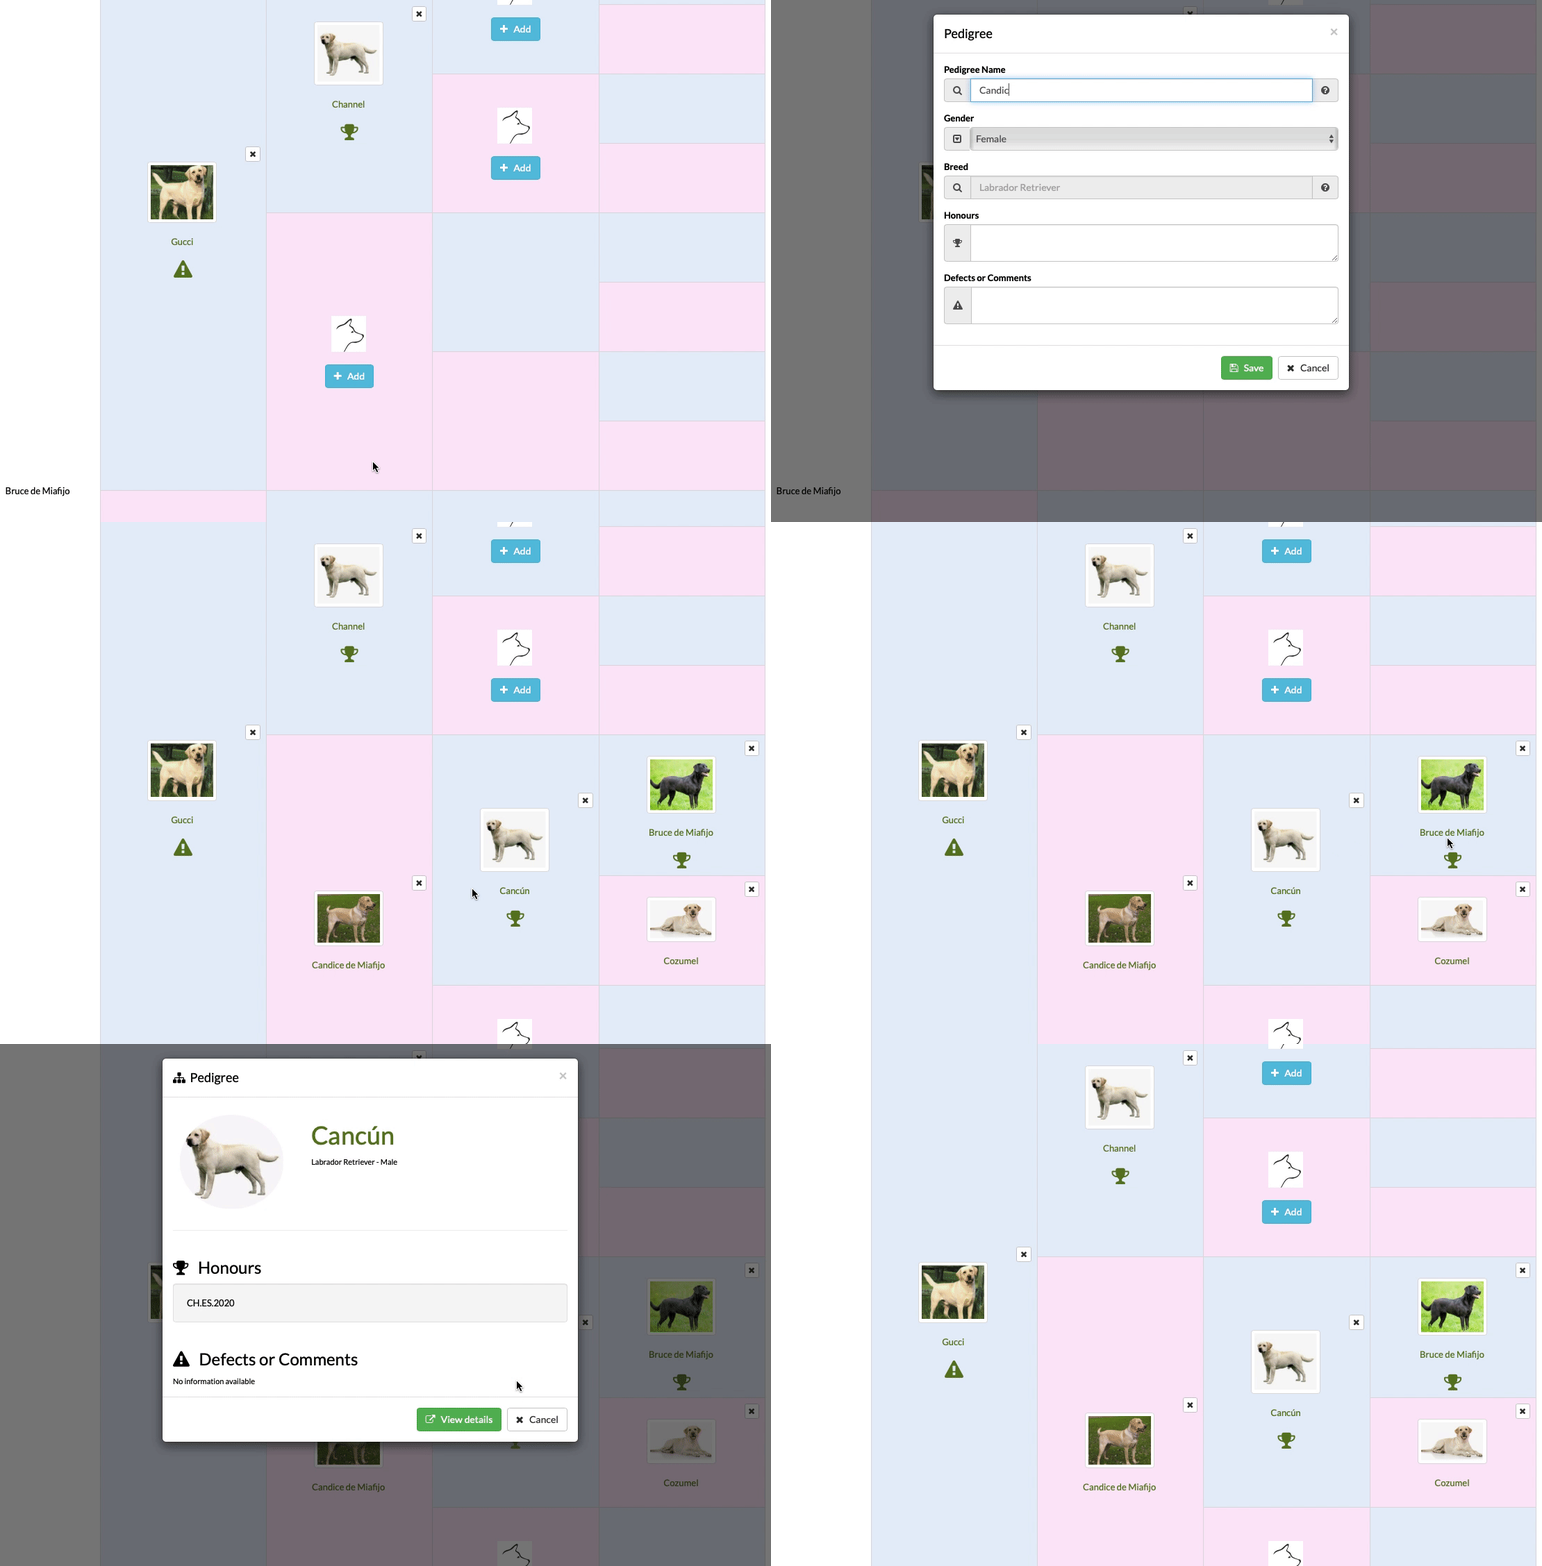
If it is not in the database because it is a new animal, when we add an animal, for example, the father, the parents of this one are enabled so that you can now fill in the data for the next generation.
For example, you have selected Caramelo as Toby's parent, but it's a mistake, and you want to remove it from his pedigree. By clicking on the X located in the upper right corner, that animal is removed from the pedigree.

(it is not permanently deleted, only removed from this pedigree)
Note - Email usage: Each time you send an email from the software,
1 unit will be added to the consumed emails.
If you also want to send the email to your email inbox
(by checking the "send me a copy" option), the email will also be sent
to
that address, and another unit will be added to the consumed
emails.
List of all customers. If you have multiple business areas, customer data is accessible from all of them, but customers are categorized by business area. You can consult them all or by business area (for example, only the Grooming customers).
A small indicator displays the total number of customers.

At the top of the screen, there is a search bar. If you enter customer information and press enter or click on the magnifying glass, all matches will be displayed
You can sort the list of customers as you need:

More information on ordering and search engines:
Clic hereYou can deactivate or mark a customer as "Inactive." When deactivated,
their data is not deleted, just hidden.
The Administrator can view the information of deactivated customers,
but those customers are not accessible to Users.
To add customers, you have two options:
Add them individually (one by one) using the Add option.
Or add multiple contacts at the same time using the Import option.
To add them, use the buttons at the top:
Click the Add Customer button, fill in the information, and click
Save.
(Refer to the New > Customer section for more
information)
Or click the Import button and follow the instructions.
How to import customers in bulk in the software
Clic here How to import customers in bulk in the softwareIf you click on a customer, all the information about them will appear. The Magic Desk is displayed, which is a summary screen or card with all the customer's information.
At the top, there are 2 buttons:
Show/hide the right sidebar menu to expand the workspace
Quick actions or "shortcuts" and Additional actions (varies depending on the software you are using)
Send Summary Sheet by Email
Print Summary Sheet
Add a new animal for this customer
HOTEL |
New Reservation and New check-in in the hotel |
GROOMING |
New Appointment and New grooming service |
DAYCARE |
New Reservation and New check-in in daycare |
BREEDING |
New Puppy Sale |
TRAINING |
New Appointment, New Training/Education Session, and Sell Course |
STORE |
New Sale |
VETERINARIAN |
New Appointment, New Veterinary Consultation |
Interactive graphs, which display a summary of the most important information (revenue, profitability, etc.). This information varies depending on the software you are using.

These intelligent statistics help you have a clear view of the activity, profitability, and loyalty of that customer "at a glance."
PET HOTEL APP
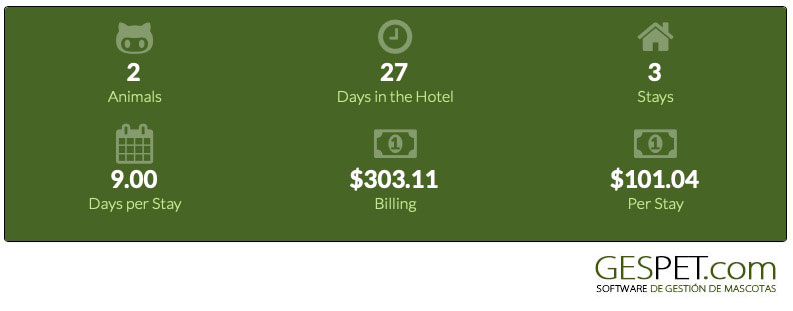
Number of days the animal has stayed in your hotel
Number of stays or accommodations in your hotel
Average days per stay
Total billing of those stays
Average billing per stay
PET GROOMING APP

Number of grooming services for that animal
Total invoicing of that animal in grooming services
Average price of the grooming services
PET TRAINING APP

Number of training/education services for that animal
Total invoicing of that animal in training/education services
Average price of the training/education services
PET NURSERY APP
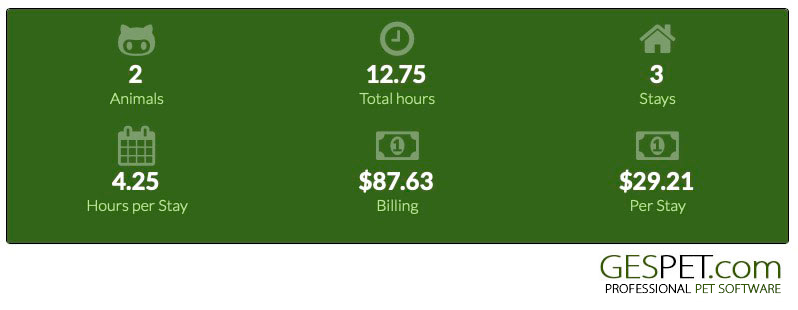
Number of hours the animal has stayed in your hotel
Number of stays or accommodations in your hotel
Average hours per stay
Total billing of those stays
Average billing per stay
PET SHOP APP
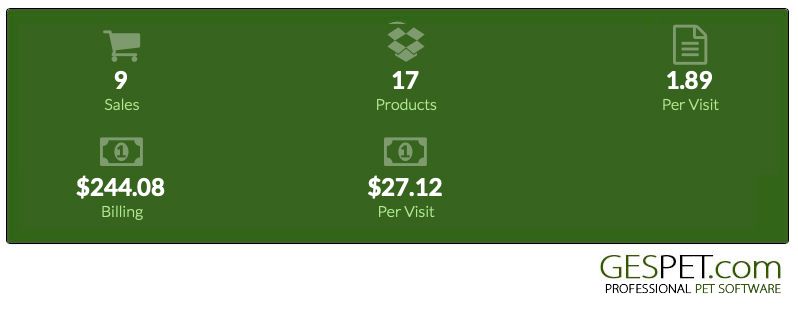
Number of sales
Total products sold
Average products sold per store visit (per purchase made)
Total revenue (total money spent)
Average revenue per visit (average money spent per purchase made)
VETERINARY APP

Number of veterinary consultations performed on their animals
Total revenue in veterinary services (total money spent)
Average price of the consultations performed
If the customer has any unpaid invoice, an alert box with the information will be displayed. Clicking on the icon will open the invoice for you to review.

This message about unpaid invoices will also appear before making a new reservation/ appointment/service....
In this option, you can both view and directly modify the information. Remember that if you make any changes, you need to click the Save button to save that new information.
Furthermore, by using the quick access buttons, you can call or open WhatsApp to chat with them; click on the corresponding icon (phone, WhatsApp, etc.).
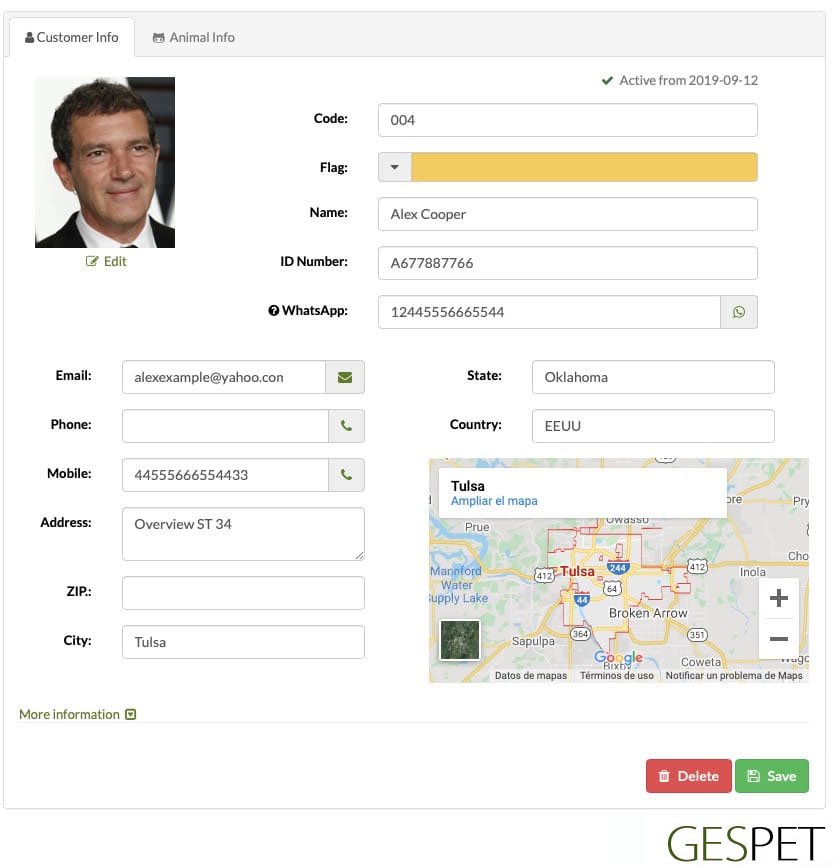
You can upload a photo or select an icon from the avatar database
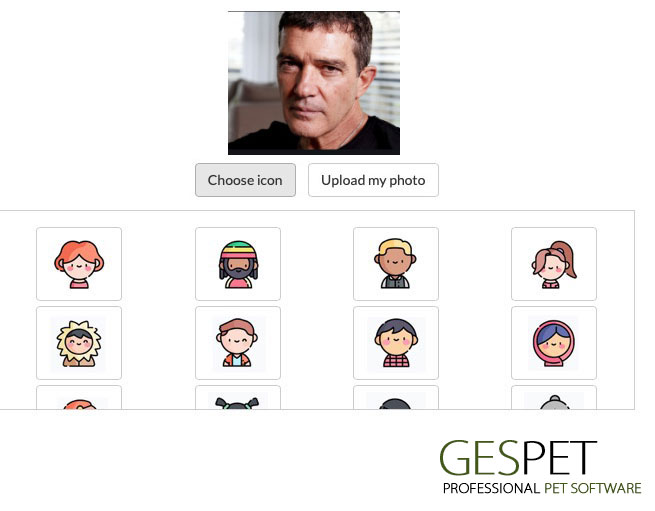
This section involves critical actions. If your business has multiple users, we highly recommend restricting access to this area.
Delete a Customer:
This option is exclusively available to Administrators and is not accessible to Users.
By selecting the option to delete this customer, all associated information will be permanently removed, including but not limited to:
Personal and contact details. Data protection information.
Invoices. Check-ins, check-outs, consultations, training sessions, and grooming services.
Animals. Pedigrees. Breeding-related data: litters, puppies, weights, etc.
Bookings and appointments, including online reservations and appointments.
Documents and contracts. Veterinary prescriptions. Attachments. Images.
Communications.
And any other information related to this customer.
Before proceeding with the deletion, we strongly advise ensuring that there are no legal obligations to retain specific information for a set period due to tax or accounting regulations.
Additionally, please note that if necessary, you can download the required information BEFORE continuing, as this deletion process is PERMANENT and data cannot be recovered once deleted.
Clicking the Delete button will trigger immediate data removal.
If you’re unsure about legal retention requirements or have any other concerns, consult with a lawyer or a data protection expert to ensure compliance with all relevant regulations.
If your business involves multiple users, we recommend using the security and access control module to restrict this option for unauthorized personnel.
Deactivate:
You can deactivate or mark a customer as "Inactive." When deactivated,
their data is not deleted, just hidden.
The Administrator can view the information of deactivated customers,
but those customers are not accessible to Users.
Select customer > from the right-hand menu Privacy > Deactivation =
yes.
You can add a date and further details about the reason for deactivation.
If you mark a customer as inactive:
When you check the list of customers (View > Customers), you'll see that they have the symbol , while the rest have the icon .
In their file, you'll see "inactive since date x."
They will no longer appear when you search to make a new reservation/appointment, service/check-in, etc.
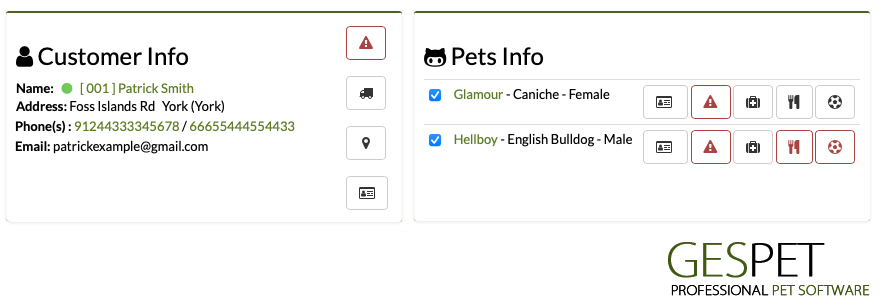
You can see the animals associated with the customer and access their animal profiles directly
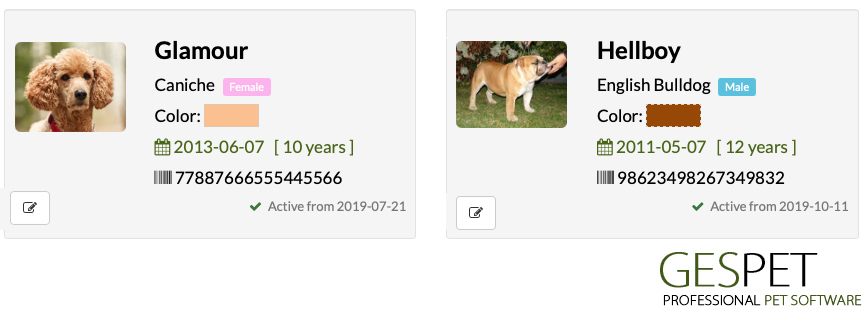
By clicking on the Animal Data tab, you will see the associated
animals, and by clicking on one of them, you can access their profile.
Highlighted Information
There are fields where you can add important or highlighted information about the customer and the animals:
Important Information
Pick-up and Delivery Information
Notes or Comments
This information will appear when you work with this customer/animal, for example, when you record a new reservation. This way, you can quickly access the relevant information.
In the side menu, there are more options available depending on the software you are using:
Documents: You can store and access documents related to that customer, such as contracts, documentation, etc. Supported file types include:
.xls, .xlsx, .doc, .docx, .odt, .ods, .pdf, .rtf, .txt, GoogleDrive Document, and GoogleDrive spreadsheet
Maximum file size: 2 MB
Reminders: You can make and check important reminders for a customer, and the application will automatically remind you of them.
Privacy: Here, you can manage all information related to privacy/GDPR.

Training
Training Services: You can see the training/education services sold to that customer.
Sales: for training services made to that customer.
Grooming
Grooming Appointments: You can see all the appointments scheduled for that customer.
Grooming Services: A list of all grooming services performed on the animals of that customer.
Sales: for grooming services made to that customer.
Hotel
Bookings: You can see all the reservations scheduled for the animals of that customer.
Hotel Stays: A list of all the accommodations for the animals of that customer in your hotel.
Sales: for hotel services made to that customer.
Daycare
Bookings: You can see all the reservations scheduled for that customer.
Daycare Stays: A list of all the stays for the animals of that customer in your daycare.
Sales: for daycare services made to that customer.
PetShop
Sales: for store purchases made by that customer.
Breeding
Sales: for breeding services made to that customer.
Veterinarian
Appointments: You can see all the appointments scheduled for the animals of that customer.
Consultations: A list of all veterinary consultations made for the animals of that customer.
Sales or Invoices: for veterinary services made to that customer.
Customer Report
Customer Address Report
Profitable Customers Report
Customers
Customer Addresses
List of all suppliers. If you have multiple business areas, suppliers data is accessible from all of them, but suppliers are categorized by business area. You can consult them all or by business area (for example, only the Grooming suppliers).
A small indicator displays the total number of suppliers.

At the top of the screen, there is a search bar. If you enter supplier information and press enter or click on the magnifying glass, all matches will be displayed
You can sort the list of suppliers as you need:

More information on ordering and search engines:
Clic hereTo add suppliers, you have two options:
Add them individually (one by one) using the Add option.
Or add multiple contacts at the same time using the Import option.
To add them, use the buttons at the top:
Click the Add New button, fill in the information, and click Save.
(Refer to the New > Customer section for more
information)
Or click the Import button and follow the instructions.
How to import suppliers in bulk in the software
Clic here How to import suppliers in bulk in the softwareIf you click on a supplier, all the information about them will appear. The Magic Desk is displayed, which is a summary screen or card with all the supplier's information.
At the top, there are 2 buttons:
Show/hide the right sidebar menu to expand the workspace
Quick actions or "shortcuts" and Additional actions
Send Summary Sheet by Email
Print Summary Sheet
You can see statistics with the total number of purchases made to this supplier and the total amount of those purchases.
If the customer has any unpaid invoice, an alert box with the information will be displayed. Clicking on the icon will open the invoice for you to review.

In this option, you can both view and directly modify the information. Remember that if you make any changes, you must click the Save button to save that new information.
Furthermore, using the quick access buttons, you can call or open WhatsApp to chat with them; click on the corresponding icon (phone, WhatsApp, etc.).

Delete: If the supplier has data referenced in other parts of the software, such as orders, purchases, etc., they cannot be deleted directly. Deleting them would cause errors in the rest of the software because those purchases, orders, etc., would no longer be associated with any supplier.
For this reason, if you want to delete them, you must first remove the data they have referenced before you can delete them.
If you've been testing the software and entering fictitious data, and now that you've finished the testing phase, you want to delete all the data to start working with the software using real data, we can do it. We can permanently delete all this data from the software. Contact us, and we will assist you.
Deactivate: Our recommendation is that, instead of deleting, you mark them as inactive or "Inactive." This way, you can continue to consult the records of that supplier and all their related information.
To mark a supplier as Inactive:
If you mark a supplier as inactive:
When you check the list of suppliers (View > Suppliers), you'll see that they have the symbol , while the rest have the icon .
In their profile, you'll see "Inactive since date x."
They will no longer appear when you search to make a new order, purchase, etc.
In the side menu, there are more options available depending on the app you are using:
Documents: You can store and access documents related to that supplier, such as contracts, documentation, etc. Supported file types include:
.xls, .xlsx, .doc, .docx, .odt, .ods, .pdf, .rtf, .txt, GoogleDrive Document, and GoogleDrive spreadsheet
Maximum file size: 2 MB
Reminders: You can make and check important reminders for a supplier, and the application will automatically remind you of them.
Privacy: Here, you can manage all information related to privacy/GDPR.
Suppliers
Suppliers
List of all veterinary contacts. If you have multiple business areas, suppliers data is accessible from all of them, but contacts are categorized by business area. You can consult them all or by business area (for example, only the vet contacts for hotel).
A small indicator displays the total number of suppliers.

At the top of the screen, there is a search bar. If you enter contact information and press enter or click on the magnifying glass, all matches will be displayed
You can sort the list of contacts as you need:

More information on ordering and search engines:
Clic hereTo add contacts, you have two options:
Add them individually (one by one) using the Add option.
Or add multiple contacts at the same time using the Import option.
To add them, use the buttons at the top:
Click the Add New button, fill in the information, and click Save.
(Refer to the New > Customer section for more
information)
Or click the Import button and follow the instructions.
How to import contacts in bulk in the software
Clic hereIf you click on a contact, all the information about them will appear. The Magic Desk is displayed, which is a summary screen or card with all the contact's information.
At the top, there are 2 buttons:
Show/hide the right sidebar menu to expand the workspace
Quick actions or "shortcuts" and Additional actions
Send Summary Sheet by Email
Print Summary Sheet
Add a new purchase made to this supplier
In this option, you can both view and directly modify the information. Remember that if you make any changes, you must click the Save button to save that new information.
Furthermore, using the quick access buttons, you can call or open WhatsApp to chat with them; click on the corresponding icon (phone, WhatsApp, etc.).

Delete: If the contact has data referenced in other parts of the software, such as orders, purchases, etc., they cannot be deleted directly. Deleting them would cause errors in the rest of the software because those purchases, orders, etc., would no longer be associated with any contact.
For this reason, if you want to delete them, you must first remove the data they have referenced before you can delete them.
If you've been testing the software and entering fictitious data, and now that you've finished the testing phase, you want to delete all the data to start working with the software using real data, we can do it. We can permanently delete all this data from the software. Contact us, and we will assist you.
Deactivate: Our recommendation is that, instead of deleting, you mark them as inactive or "Inactive." This way, you can continue to consult the records of that contact and all their related information.
<>To mark a contact asInactive: In the View > Suppliers
option, select the Contact > in the right sidebar Privacy > Inactive = yes.
If you mark a contact as inactive:
When you check the list of Contacts (View > Veterinary), you'll see that they have the symbol , while the rest have the icon .
In their profile, you'll see "Inactive since date x."
In the side menu, there are more options available depending on the app you are using:
Documents: You can store and access documents related to that supplier, such as contracts, documentation, etc. Supported file types include:
.xls, .xlsx, .doc, .docx, .odt, .ods, .pdf, .rtf, .txt, GoogleDrive Document, and GoogleDrive spreadsheet
Maximum file size: 2 MB
Reminders: You can make and check important reminders for a supplier, and the application will automatically remind you of them.
Privacy: Here, you can manage all information related to privacy/GDPR.
List of all expenses or purchases you have recorded. If you have multiple business areas, expenses or purchases are accessible from all of them, but you can view them collectively or independently (for example, only the Hotel expenses).
A small indicator with the total number of expenses is displayed.
At the top of the screen, there is a search bar. If you enter expense information and press enter or click on the magnifying glass, all matches will be displayed
You can sort the list of expenses as you need:

More information on ordering and search engines:
Clic hereTo add a new expense, click on the 'Add New' button icon, fill in the
details, and click 'Save'.
(Refer to the 'New > Expenses' section
if you want to see more information)
How to record expenses in the software:
Clic aquiWhen you click on an expense, the details appear.
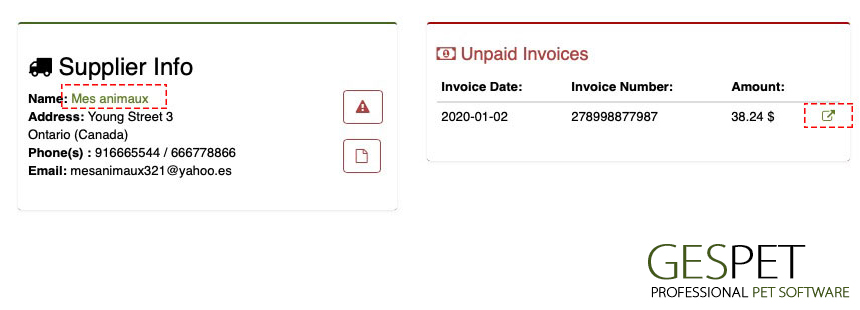
By clicking on the supplier's name, their profile opens in a new tab.
By clicking on the supplier's icons, you can view and edit their
notes and important information.
(If they have information,
it appears in red).
If there are outstanding invoices for that supplier, they will
appear on the right-hand side.
(By clicking the small arrow
icon, you can open that unpaid invoice in a new tab).
The Report > Expenses > displays the details of expense or purchase invoices within the selected date range and for the chosen business areas. (This is useful for accounting, document preparation, or tax filing, as it provides detailed data for each invoice.)
The Report > Results > is more suitable if you prefer to view only the expenses (without the complete invoice details).
Expenses
TAGS:
payment methods breeder software | payment methods pet store software | breeder employees software | dog breeder software | animar breeder | taxes configuration breeder app | taxes configuration breeding app
Related Posts:
GPRD. Privacy and security