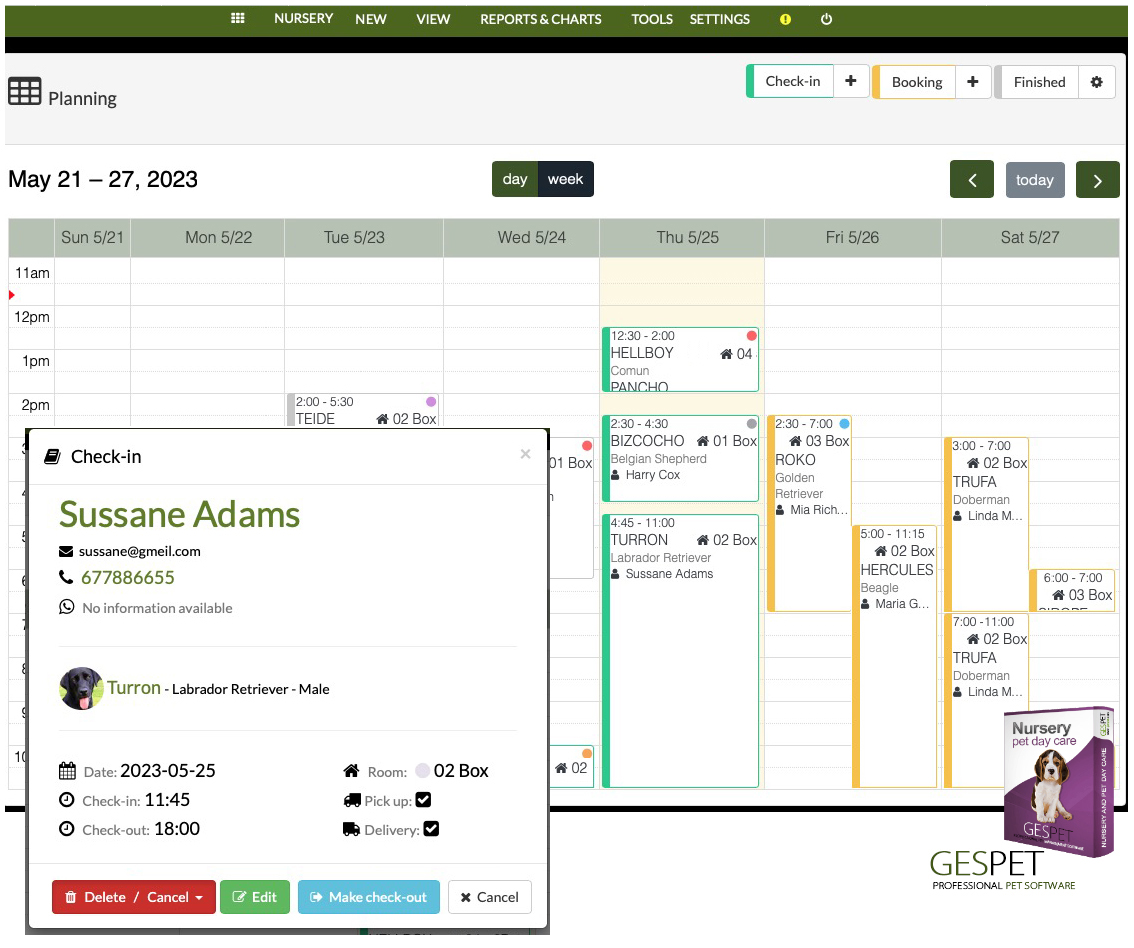
In this option, you will see the agenda or schedule with all appointments and stays.
They are identified with a color border:
Green for services
Yellow for appointments
Gray for those that have already been finished or completed **
** You can choose whether you want to see the completed ones on the schedule or not. To configure it, you just have to click on the icon next to Completed and select the option you prefer.
You can directly add booking and check-in by clicking the
+ button located at the top right of the screen
For more information, check the section New > Booking or New > Check-in.
You can drag and drop booking/Check-in to change the day/hours. And you can also drag to change the duration.
The buttons in the center allow you to change the daily, weekly, etc., view and navigate between different days/weeks/etc.
You will see that some booking/Check-in have a small color circle in the top right corner. You choose the colors you use to identify different things in your business and can use this to identify something in that appointment/check-in quickly.
You can assign a color label to the booking if you want to identify it more quickly.
Color Labels: 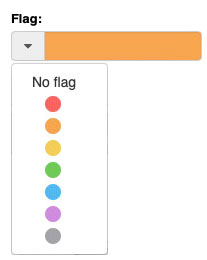
You can assign a color to quickly identify a
booking/check-in/service/etc. or a customer/animal/etc. For example:
|
If there are scheduled reminders for that booking and you modify the
date/time,
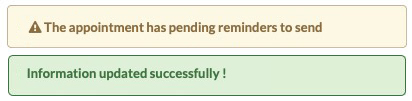
the reminders are not deleted. A notice is displayed at the top
of the screen: The booking has pending reminders to send.
So that you decide whether to keep the
reminders or delete/create new ones.
|
For example:
If you want, you can delete that reminder and schedule a new one. |
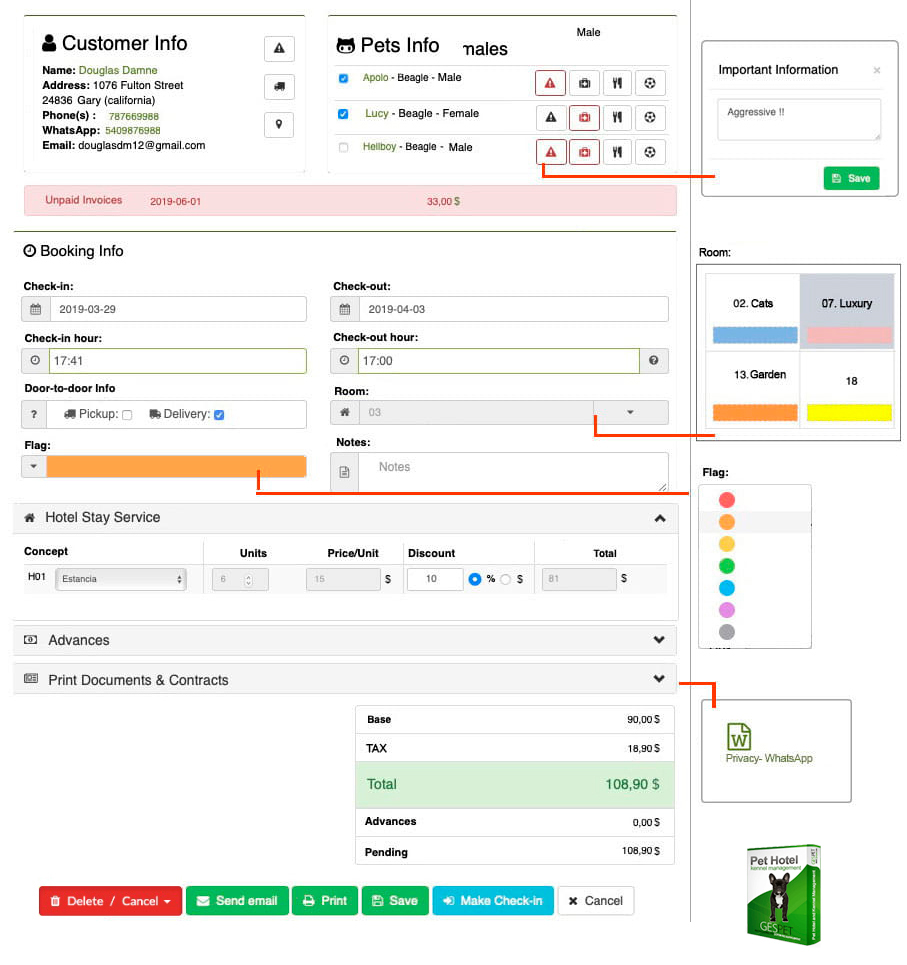
If you click on a booking/check-in, more information and available actions appear:
The customer and their basic contact details
The animals
The date and time of check-in
The employee or groomer assigned to that service
If it has pick-up and/or delivery service
If you click on the customer and animals' names, their profile opens in a new browser window.
If you click on the phone or WhatsApp, you can call or contact the customer via WhatsApp, on compatible devices.
You can configure various aspects of the schedule:
If you want to view completed stays (shown in gray)
The range of hours displayed in the schedule, for example, from 09:00 to 20:00
These configuration options are available in the option Configuration > Schedule.
You can edit a booking or an check-in to modify what you need
To start a stay or make the check-in of the animal in your daycare, click on the Convert to check-in button.
To end a stay, click on the Check out button.
You can choose whether you want to:
Check out, charge, and invoice
Check out and charge in Store (you can add products and other services)
Only check out (without charging and invoicing)
To exit without taking any action, you just have to click on the Cancel button.
You can cancel and delete booking:
You can delete the booking outright. Deletion is permanent; it cannot be recovered afterward. It is used if, for example, you added it by mistake and simply want to delete it.
You can also cancel the booking. The process is similar to deletion but "leaves a record." If, for example, the customer does not attend the booking, calls to cancel it, or you need to cancel it for some reason... you can cancel it and there will be a record of that cancellation.
Additionally, when you go to enter a new booking, you will see the last canceled booking for that customer and the reason. This way, you can know if a customer tends to cancel, not attend their booking, etc., before entering a new booking for them.
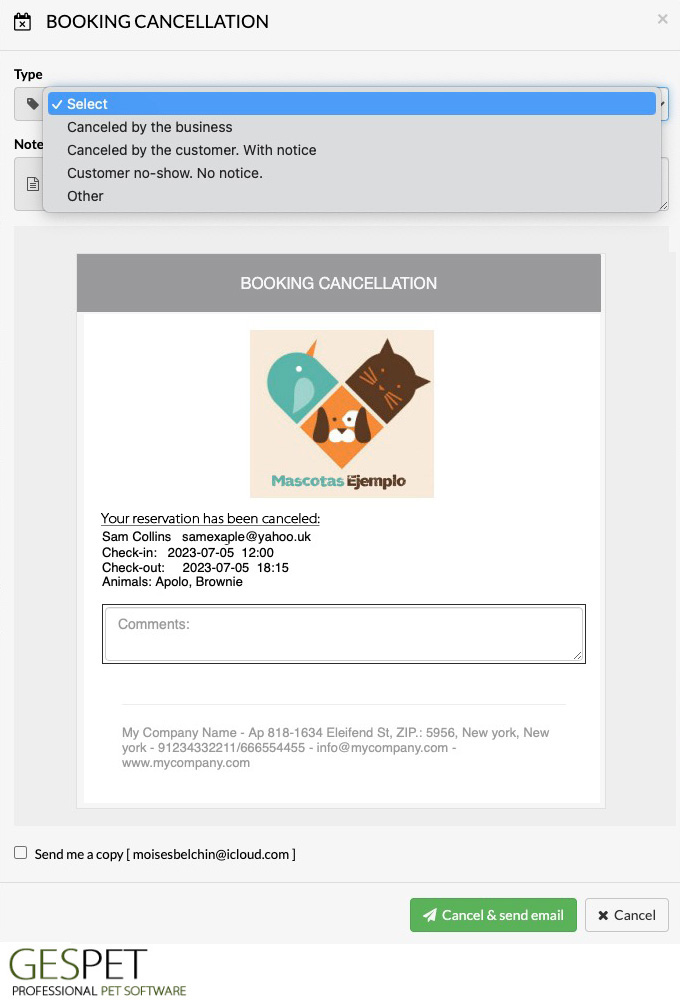
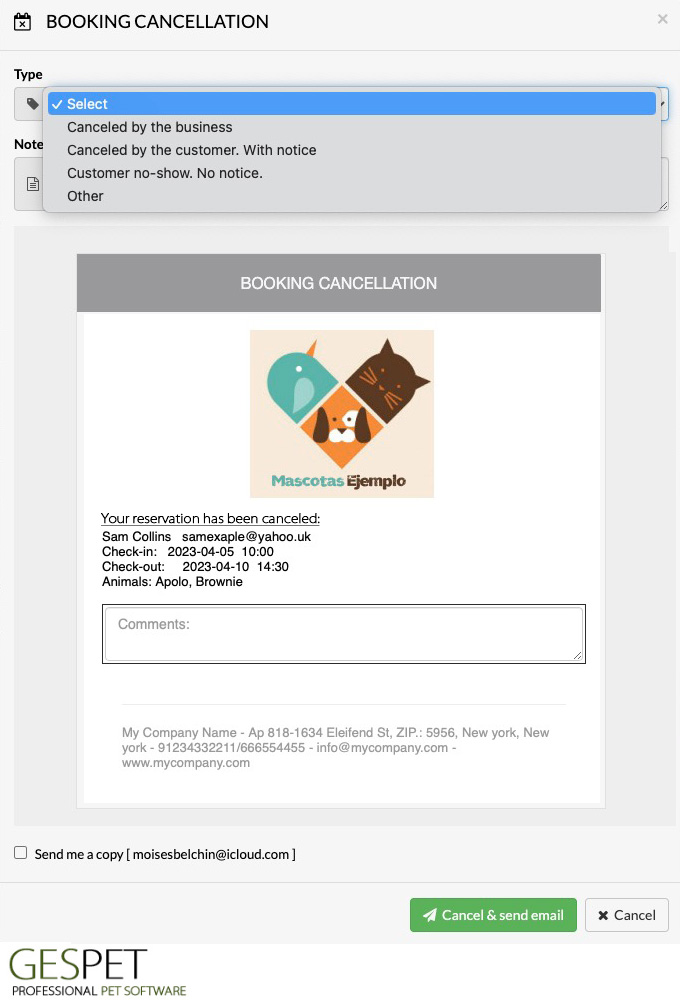
For your information, you can add the type or reason for the cancellation:
Canceled by the business. You cancel the booking or booking
Canceled by the customer with notice. The customer informs you in advance that they will not attend the booking.
Canceled by the customer without notice, they do not show up for the booking and do not cancel it
Other reason
If you want to provide more information, you can do so in the NOTES field. Only you will see this information; the customer will not see this information.
When sending the booking cancellation to the customer via email, you can send yourself a copy to your email if you want. (If the customer does not have a configured email address, an error message will appear on the screen to inform you that it will not be possible to cancel and send the email).
You can view this information in different parts of the software:
In the customer's profile, you can check the history with all their canceled booking.
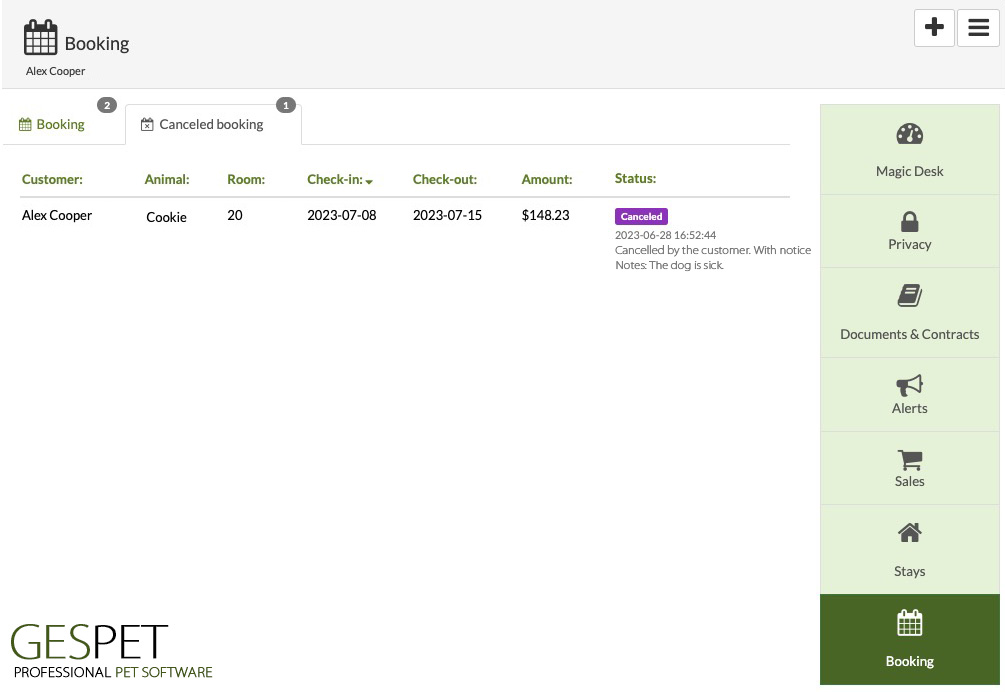
In the option View Booking > You can filter to see only the canceled ones
Before entering a new Booking or check-in for a customer, a notice will appear so you know if they have previously canceled booking.
For more information, check the section View > Booking
From this option, you will see a list with all the bookings.
If the expected departure date has passed and the check-out has not been done yet, it shows the indicator .
If you do not want to see overdue entries, you can deactivate it in Settings >
Advanced Settings
You can search using the search bar at the top and sort as you like by clicking on the table's title.
More information on ordering and search engines:
Clic hereIf, for example, you made a mistake when adding a booking, you can simply delete it. This will not leave any record.
But you can also cancel the booking. The process is similar to deletion, but "leaving a record". If, for example, the customer does not attend the booking, calls to cancel it, or you need to cancel it for some reason... you can cancel it, and there will be a record of that cancellation.
Additionally, when you go to enter a new booking, you will see the last canceled bookings for that customer and the reason. This way, you can know if a customer usually cancels, does not attend their bookings, etc. before entering a new appointment for them.
For your information, you can add the type or reason for the cancellation:
Cancelled by the business. You cancel the booking or appointment
Cancelled by the customer with notice. The customer notifies you in advance that they will not attend the booking.
Cancelled by the customer without notice. They do not show up to the booking and do not cancel it.
Other reason
If you want to provide more information, you can do it in the NOTES field. This information is visible only to you; the customer will not see this information.
When sending the customer the cancellation of the appointment/booking by email, you can send yourself a copy to your email if you wish.
You can view this information in different parts of the software:
In the customer's file, you can consult the history with all their cancelled bookings.
In the option View Bookings > You can filter to see only the cancelled ones
Before entering a new Booking or check-in for a customer, a warning will appear to let you know if they have previously canceled appointments.
You can directly add bookings by clicking the button located at the top right of the screen
Select the customer, and you will see:
All their information
Their animals
If they have outstanding invoices
If they have previously canceled bookings
Booking details: dates/times, room, if there is pick-up/delivery service, ...
You can schedule automatic reminders so that the software reminds them of their booking and much more. Check the section New > Booking for more information.
To convert to an check-in in that appointment, there are 2 options:
Quick: Ideal for entering massively for multiple animals.
Click the button
A pop-up window opens to confirm the operation
If you click again on the button, that booking is "converted into an check-in," meaning the animal's check-in is recorded, and if this process is successful, a green message appears.
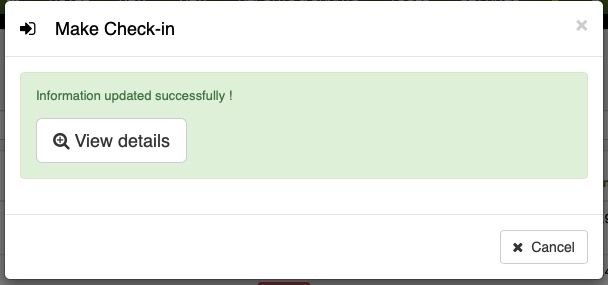
Now you can:
Click Cancel to close the window to perform another task.
Click to view in detail or edit that check-in.
Detailed: If you want to see the detail before entering.
Click on the booking, and the entire detail opens. You can review it and edit what you need.
At the bottom, click the button
Pour convertir en arrivée cette réservation, vous avez 2 options :
Rapide : Idéal pour enregistrer plusieurs animaux en masse.
Cliquez sur le bouton
Une fenêtre contextuelle s'ouvrira pour confirmer l'opération
Si vous cliquez à nouveau sur le bouton , cette réservation sera "convertie en arrivée", c'est-à-dire que l'arrivée de l'animal sera enregistrée et, si le processus est réalisé correctement, un message vert apparaîtra.
Vous pouvez maintenant :
Cliquez sur Annuler pour fermer la fenêtre et effectuer une autre tâche.
Cliquez sur pour voir en détail ou éditer ce arrivée.
Détaillé : si vous souhaitez voir les détails avant de faire l'arrivée.
Cliquez sur la réservation et tous les détails s'ouvriront. Vous pouvez les vérifier et modifier ce dont vous avez besoin.
En bas, cliquez sur le bouton
Lors de l'enregistrement avec une réservation préalable ("convertir" une réservation en arrivée), vous verrez le vérificateur avancé.
Il affiche si l'occupation est :
ou
Le vérificateur vous montre l'état et vous décidez :
Si vous souhaitez modifier ou éditer cette réservation pour attribuer une autre chambre ou chenil avant de faire l'arrivée, cliquez simplement sur le bouton
Ou consultez le planning en cliquant sur l'option Voir Planning
Ou procédez à l'arrivée dans cette chambre de toute façon en cliquant sur
Vous pouvez modifier ce dont vous avez besoin, et en bas, vous avez plusieurs options qui vous permettent de :
Supprimer la réservation (elle ne peut pas être récupérée si elle est supprimée)
Imprimer le document récapitulatif, avec toutes les informations du arrivée
Enregistrer, si vous avez apporté des modifications
Check-out ou sortie
Annuler ou sortir sans enregistrer
Vous pouvez ajouter des rappels automatiques pour que, le jour sélectionné, le logiciel envoie un rappel au client pour son rendez-vous.
Ajoutez autant de rappels que vous le souhaitez en cliquant sur le bouton AJOUTER.
Vous pouvez choisir le jour où vous souhaitez que le rappel arrive en entrant une date personnalisée ou en utilisant la calculatrice de dates. Si vous sélectionnez 15 jours avant, le logiciel calculera 15 jours avant la date du rendez-vous.
Si le client effectue un paiement, notez-le dans la section Avances, et vous verrez que, en bas, le montant total, le montant déjà payé et le montant restant à payer seront affichés.
Des documents ou des contrats que vous avez configurés pour être imprimés et/ou remis au client apparaîtront.
Par exemple, conditions d'annulation de réservation, informations préalables à la réservation, ...
Pour ajouter de nouveaux documents ou contrats associés au rendez-vous, allez dans Outils > Documents et sélectionnez le type Rendez-vous ou Réservation
Les documents incluent la fonction de complétion automatique des données, ce qui vous fera gagner beaucoup de temps.
Click on a booking to view it in detail and edit it.
If the customer is new:
Click on the button
Fill in the basic and contact information
The software automatically checks if that email address or ID already exists and shows a warning to avoid duplicate contacts
If you want to include more information (address, state, etc.), click on More information
To write the information about Privacy/GDPR, click on Privacy
Add basic information about their animals
(Later, in the animal file, you can add more information)
Click on Save and continue to continue.
If the customer already exists:
Write the name and select from the drop-down
If he already has animals, they will appear on the right. If not, you can add his animals:
In both cases, if the customer has several animals configured, you can select which ones you want to booking/check-in/...
If there's information, the button is highlighted in red
Print customer or pet file |
|
Important information |
|
Pick-up and delivery information |
|
| View the address on GoogleMaps | |
Hotel and Daycare/Nursery |
|
Meal planning |
|
Break planning |
|
Training and Grooming |
|
Important veterinary information |
|
Veterinarian |
|
Information about Allergies and Intolerances |
|
You can modify what you need, and at the bottom, you have several options that allow you to:
Delete the booking (cannot be recovered if deleted)
Print the summary document, with all the check-in information
Save, if you have made any changes
Check-out or check-out
Cancel or exit without saving
You can add automatic reminders so that, on the selected day, the customer receives an email reminder of their booking. These reminders are sent automatically; you don't have to send them manually.
You can add as many reminders as you want by clicking the ADD button.
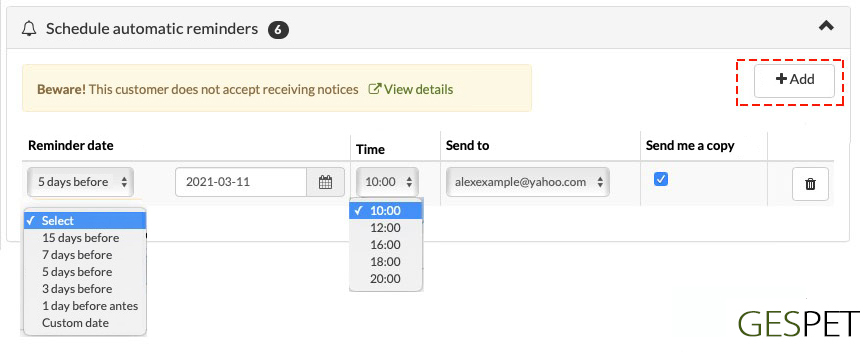
You can choose the day you want the notice to arrive by writing a custom
date or using the date calculator.
For example, if you select 15 days
before, the software calculates 15 days before the appointment date and
writes it in the date field.
If you select, for example, to send the automatic reminder 7 days before, but there are 5 days left for the booking, logically, it can only be scheduled to be sent 4 days before the booking.
You can also select the time you want it to be sent from the Time dropdown. If the customer has multiple email addresses, you can choose which one to send it to.
If you select the "Send me a copy" option, you will receive a copy in your email.
When you Save, these reminders will be scheduled to be sent on the selected
date/time. They will appear here and in the View > Automatic
Reminders.
Reminders cannot be modified, but you can cancel the reminder and create a new one.
If you modify the service date, the reminders will not be automatically deleted. You can keep the reminders you had scheduled or cancel them and create new reminders, as you see fit.
|
For example:
If you want, you can delete that reminder and schedule a new one. |
Read more about the automatic sending of reminders for upcoming booking:
How to configure your Hotel services efficiently?:
Keep readingIf the customer pays money, note it in the Advances section, and you will see that at the bottom, the total money, the amount already paid, and the pending amount to pay are displayed.
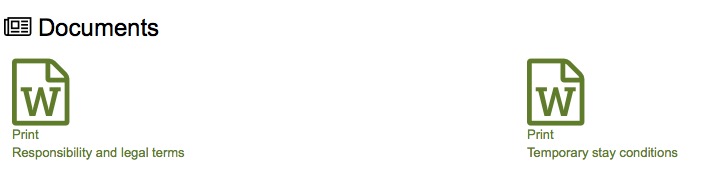
The documents or contracts that you have configured to print and/or deliver
to the customer will appear.
For example, booking or accommodation
conditions, legal conditions, rates/prices, requirements, contract, etc.
You can indicate the type of each document: Privacy, Appointment, Service, ... and for greater convenience, they will appear right at that moment so you can print them, deliver them to the customer, or whatever you need.
To add new documents or contracts associated with the booking, go to the
Tools option > Documents and select the type Appointment or
booking
The documents include the auto replace data feature that will save you a lot of time. If you want, you can read more information about documents and contracts below:
How to configure your Hotel services efficiently?:
Keep readingAt the bottom, you will see the price, which is updated as you add extras,
discounts, advances, etc.
It appears detailed:
The Base price (without taxes)
The money corresponding to the tax you have configured, for example, VAT
The final price: base + taxes
The money paid (advances)
The money pending to be paid
If you click the Save button, the appointment or booking is recorded in
the software, and new buttons appear for:
You can Save again if you have made any changes
To exit without taking any action, simply click the Cancel button.
You can Print the summary document of the appointment or download it in .pdf format
You can Send by email the booking confirmation to the customer
If you want, you can attach the booking summary to the booking confirmation.
You can also send yourself a copy to your own email.
You can start the stay of the animal, that is, check-in.
And you can also Delete or Cancel the booking. Check more information about canceled bookings in this same section View bookings > Information about canceled bookings
When a customer requests you an online appointment:
You will receive the email with the customer's request.
It will be recorded in the software and will appear in:
The main screen or daily agenda with a notification icon:
In the top menu of the software, an icon will appear.
In the View > Online Appointments section, you will find all the requests.
Appointments can have different status:
Pending to confirm: the customer has requested the appointment but you have not confirmed it
Canceled: when you have rejected it
At the top, there is a search bar that will help you quickly locate an online appointment request, and you can also filter to view all of them or just the canceled or pending ones.
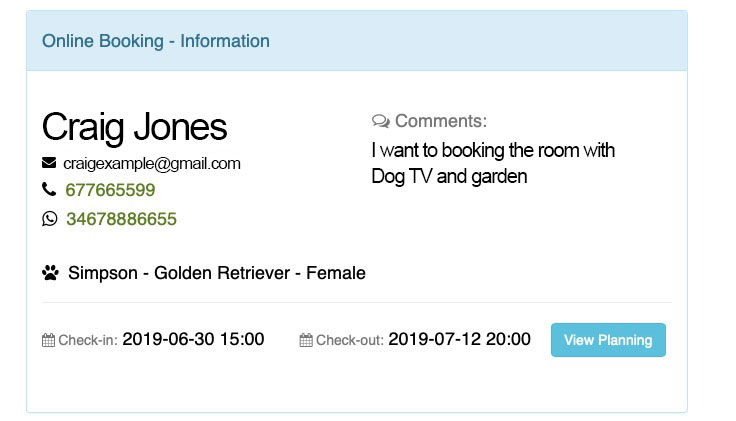
If you click on the Confirm Button (in green), the data filled in by your customer appears.
The phone number and WhatsApp are active, so if you click on them, you can call the user or contact them using WhatsApp.
You can view the schedule to check for availability by clicking on the View > Schedule button; it opens in a new web browser tab.
Search for the customer to see if they already exist in your database. If they don't exist, click on the Add Customer and Animals button.
It's very fast; the data is already pre-filled. Just review the information, add any additional information or privacy (GDPR), and click on Save and Continue.
You can make changes to the date/time, assign an employee, add services, discounts, and when you save, this request will have turned into an APPOINTMENT.
Now, it will no longer appear in View > Online Appointments but will appear in View > Appointments or Bookings.
You can directly send an email from the software to the customer to confirm or cancel their request.
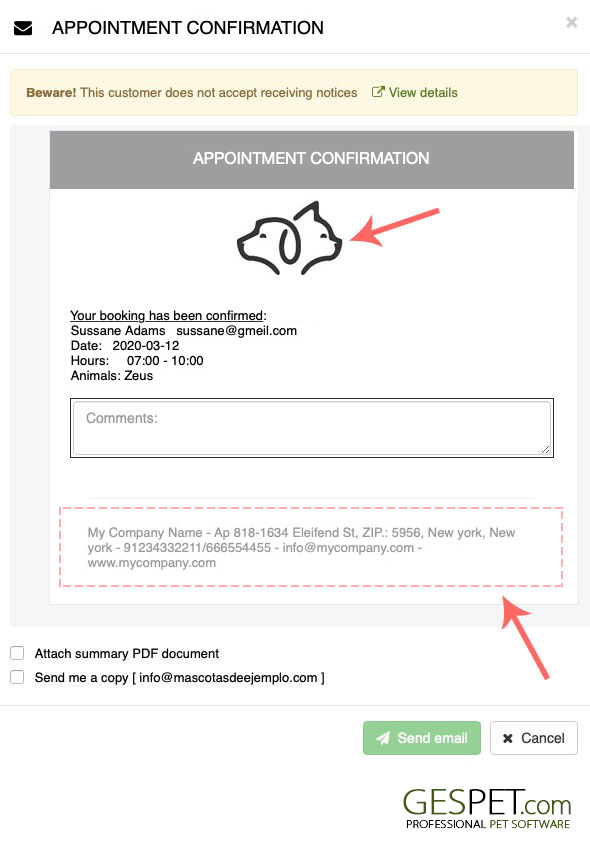
Just click the Confirm button or the Cancel button.
The email that will be sent includes the details of your business and the logo, as well as the reservation or appointment details (customer name and animals, date/time).
In the middle of the email, you can add any additional information you need (complementary information, schedules, price, service prerequisites, etc.).
If you want, you can receive a copy of the confirmation or cancellation to your email.
The data of your business, the logo, and the email are configured in the option Configuration > Company Information.
More information about email consumption (Quota details):
Keep readingThe system is free and available for pet hotel, pet daycare, pet training, veterinary, and pet grooming.
Right from the start of working with Gespet, you have access to your online booking page to start using whenever you want.
Share it via WhatsApp, email, or anywhere you like
Share it or print it for your business, posters, and more
Add it to your bio or include it in your posts
Paste a code and it will appear instantly on your site
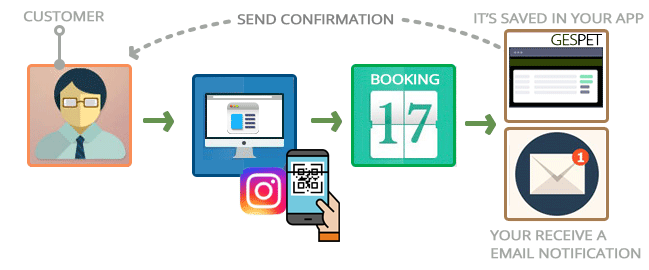
No complicated setup. No long processes. It’s this simple:
Share with your customers and receive requests
Accept or reject and send confirmation or cancellation in one click
Everything is saved automatically

See availability

Check pending payments


Contact your customer

Send cancellation if rejected

Send confirmation if accepted
Tips & suggestions
In confirmation messages, you can:
Remind customers of important information (e.g. required vaccines or rules)
Explain your cancellation policy
Include payment instructions if needed
Customize everything to fit your business
Quick and easy setup
With the CRM, Marketing & Communication module, you can create professional templates with auto-filled data in multiple languages.
Settings > Email templates > Service emails
Templates adapt automatically to your customer's language and can be edited before sending.
Without the module, you can still write messages manually.
Discover the CRM moduleYou decide which information you want to collect from your customers and their pets. For example, the phone number can be required, while WhatsApp can be optional.
They fill in their details, you receive the request, and that's where the
Gespet
magic begins.
You receive an email notification letting you know that a new request has been submitted, and everything is automatically recorded in Gespet. When you review it, you'll see all the information provided by the customer (which can be more or less detailed, depending on the information you've chosen to request).
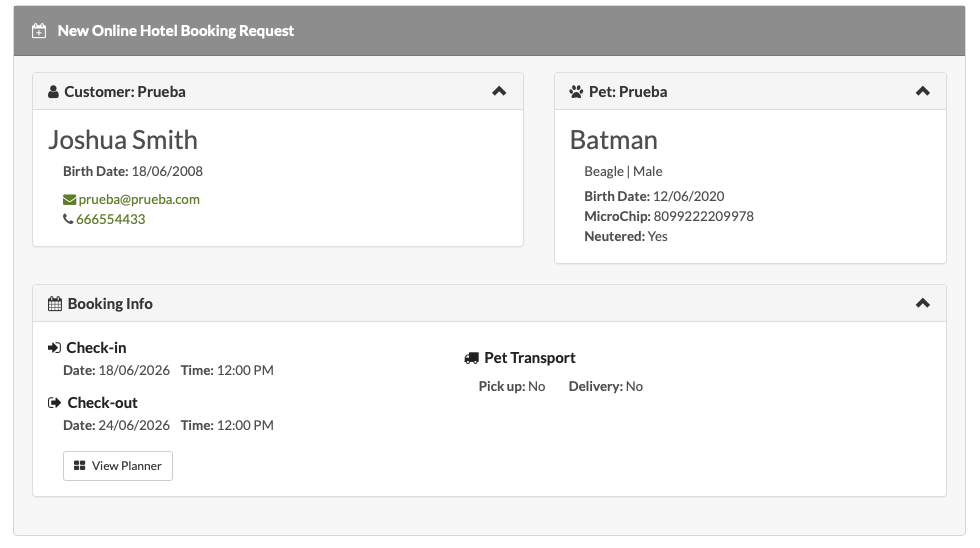
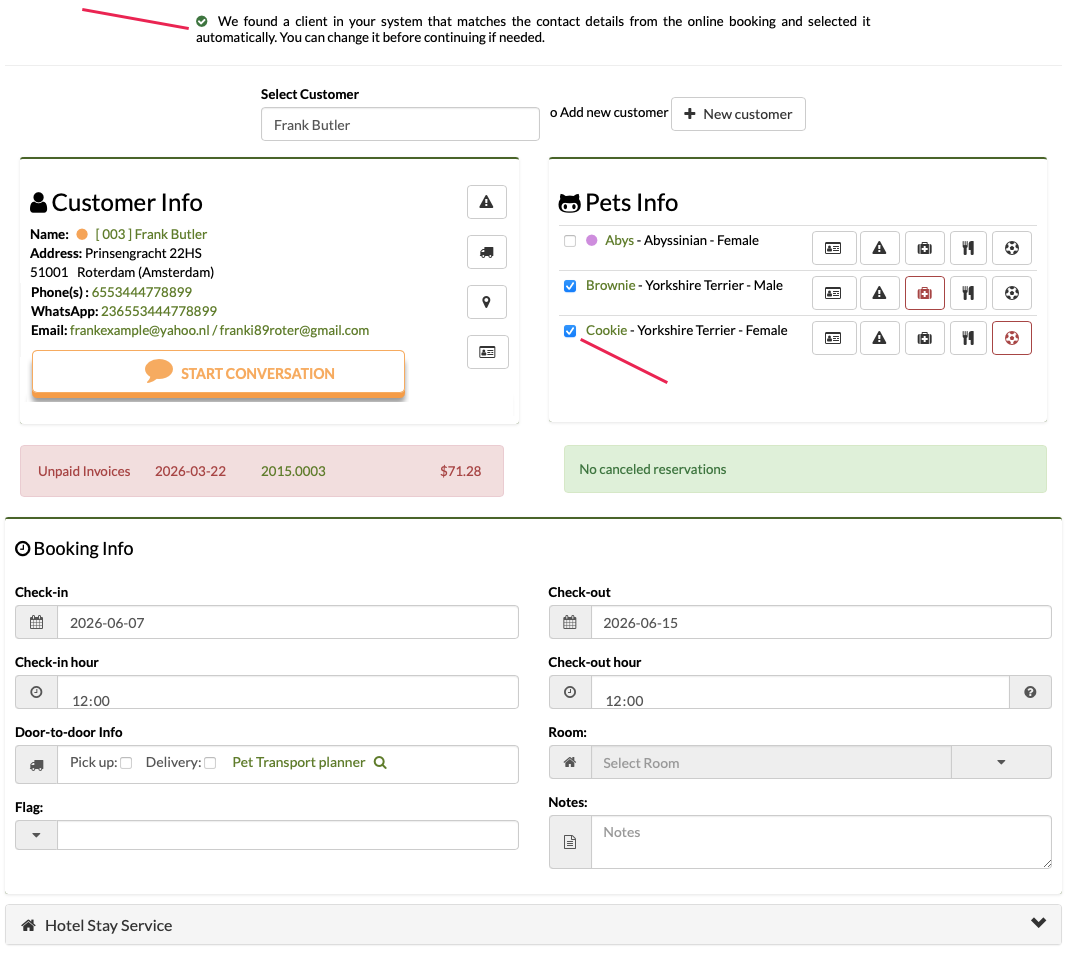
You don't need to search for the customer yourself. Gespet will automatically search your database and, if it detects that the customer already exists, it will display a notification.
You'll see this alert, and the customer will already be pre-selected. You can change it if necessary.
If the customer has multiple pets but has only requested a booking for one of them, only that pet will be selected, helping you avoid mistakes.
The dates and times are already selected for you, so you don't have to enter them manually. However, you can modify them if needed.
As always, Gespet will notify you if the customer has unpaid invoices, cancelled bookings, or previous no-shows.
As you can see, this saves you a tremendous amount of time.
If no matching customer is found in your database when the request is received, you will see the following message:
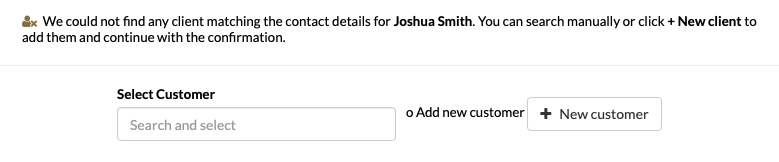
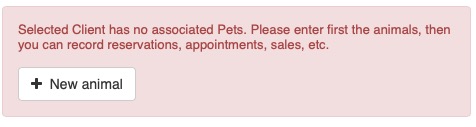
You can search manually or add the customer directly. Simply click on + New Customer, and all the information entered by the customer will already be included.
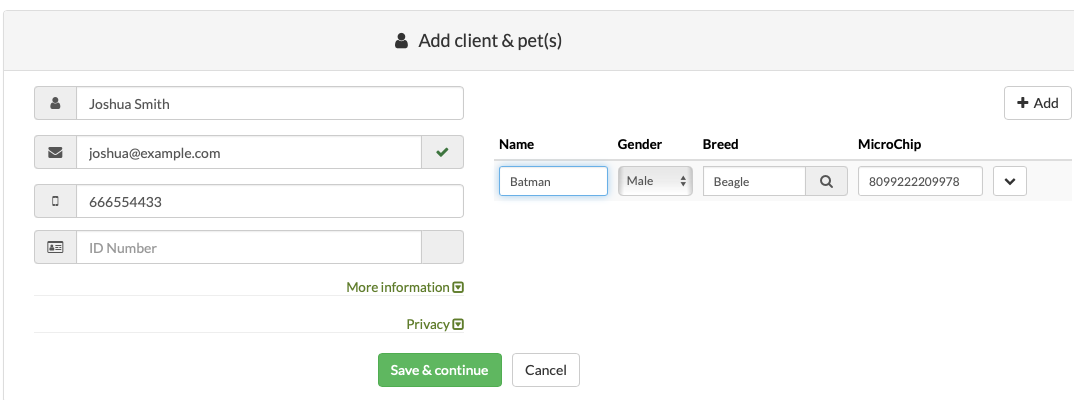
You can edit or add anything you need and:
The customer and their pets are automatically added.
The date and time information has already been completed.
You can make any necessary changes and, when you click Save, the new booking will be created. You can view it under VIEW > BOOKINGS.
Several buttons will appear at the bottom of the screen, including the Send Confirmation button, which allows you to send the booking confirmation directly to the customer.
An easy way to share your online reservation link with clients is by sharing the link.
Simply access your Gespet account and go to Settings > Online Booking.
In tab number 2, select the language for the booking form, and you'll see the link.
Copy that code, and you can now share it with your clients.
If you click on the button the link will open for you to see your online booking page or form.
Here are some ideas on how you can use it:
You can send it via email, WhatsApp, SMS, private message on your social media, ...
You can include it in the footer/contact details of your emails, WhatsApp messages, ...
If you print advertising, you can include it.
It's as simple as sharing a phone number or address.
QR codes, when read or scanned, can directly display a web page, a message, a phone number, etc.
In our case, we've programmed the code so that when read or scanned, it automatically shows your online booking page.
If you select the French language, it will display the page in French. Or if you select the Spanish language, it will display the page in Spanish.
It's exactly the same as sharing the link, but it will pleasantly surprise your customer with an elegant QR code.
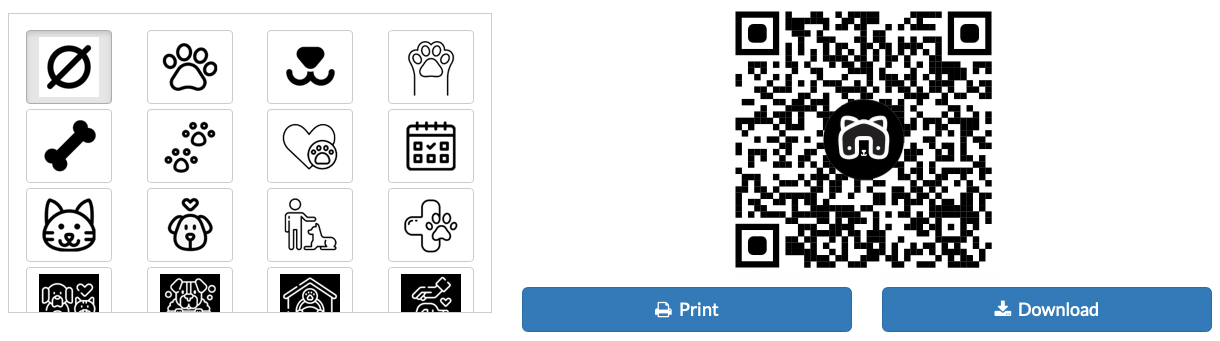
How about making it even more special? Differentiate yourself from your competition by using an elegant custom QR code with an icon in the center – your customer will love it.
Sharing it is exactly like sharing a photo. When they scan it with their mobile phone, your booking page or form will appear, allowing them to request bookings at your business.
On your mobile phone, open the camera app.
Point the camera at the code until a message or URL appears.
Click on that message, and your online booking page will open automatically.
QR codes are an excellent way to easily share information with your customers. Quick and Easy Access.
They are an innovative and modern marketing option, improving the
perception of your
business among customers.
It shows that your business is aware of the latest technological trends.
Interactivity. Customers find the interactivity provided by scanning QR codes appealing. This creates a more emotional connection with your business and encourages customer engagement.
In summary, using QR codes is a versatile and modern strategy that improves the customer experience, provides convenience, and demonstrates a commitment to innovation.
At Gespet, we offer you this option for free and very easily. Just select the language and whether you want to customize the design. And you'll have your code ready to use.
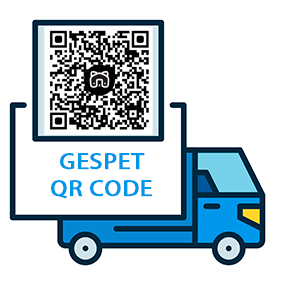
Do you have a work vehicle? You can print your QR code on adhesive vinyl so that people who see it can scan it and make bookings. By simply leaving your vehicle parked, the number of potential customers for your business will increase significantly.
Including it in your email is very easy, for example, in the signature where your details appear.
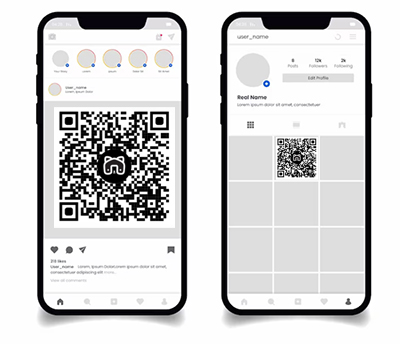
Make a post on your social networks using your new QR code: Instagram, Twitter, Facebook, Pinterest, etc.
Are you going to print advertising cards? Include the code and attract the interest of the users who receive them.
How about placing it in the showcase of your business? Even if it's closed, you can still receive bookings.
And give your customers a refrigerator magnet with your QR code...?. When they want to make an appointment at your grooming, veterinary, pet hotel, etc. They just scan it, and it's done.
As you can see, the possibilities are endless. What are you waiting for to try it out?. It is available in the Settings > Online Booking option.
It's very simple:
Include a link.
In Gespet, access your account and:
Go to Settings > Online Reservations
In option 2. Start using it > Select the language you want, and a code will appear.
Click COPY
Go to Instagram, Twitter, Youtube, or wherever you want:
In your profile, tweet, message, or wherever you want to share the link, paste the code you just copied.
Read more information about the setup on different social media:
Click hereInclude your website or blog. If on your website/blog you have a section to request online bookings, with the integrated form, and you want your customers to access it:
Go to Instagram, Twitter, Youtube, or wherever you want:
Publish the QR code.
In Gespet, access your account and:
Go to Settings > Online Bookings
In option 2. Start using it > Select the language you want and customize the QR code design if you want.
Click on download.
On Instagram, Twitter, Youtube, or wherever you want:
In your profile, tweet, story, post, message, or wherever you want, publish the QR code, just like you would with a photo or image.
You can easily integrate the online booking system into your website and blog. The form will appear for your clients to request a booking.
To choose the one that best suits your needs, you have two options:
Include the form directly (this option is called Iframe Mode)
Include a button, and when clicked, the form opens in a popup window (this option is called Button Mode)
In Gespet, access your account and:
Go to Settings > Online Booking
In option 3. Integrate it into your website > Select the language you want, and the two options will appear: IFRAME and Button.
If you want to include the button, in the Button Mode option, copy the code that appears:

At the bottom, you will see the preview. That is how the button will look when you include it on your website/blog.
If you want to include the form directly, in the IFRAME Mode option, copy the code that appears:

On your website or blog:
Access the source code and where you want the button or form to appear, paste the code you just copied. It's that simple.
(If you don't know how to do it, you can share this code with your webmaster for them to include it on your website)
On your website, the button that opens the form or the form directly,
depending on the option you have chosen, will appear. And you don't
have to
do anything else.
You can also use it on:
Twitter, Youtube
WordPress
WooCommerce
PrestaShop
Magento
Blogger
Drupal
OpenCart
Zen Cart
osCommerce
Joomla
Mambo
Shopify
Squarespace
... more
List of all check-in that have not been checked out yet, meaning the animals that are currently housed.
If the expected check-out date has passed and the check-out has not been done yet, display the indicator .
If you don't want to see overdue check-in, you can deactivate it in Settings >
Advanced Settings
You can search using the search bar at the top and sort as you like by clicking on the table's title.
More information on ordering and search engines:
Clic hereYou can modify what you need, and at the bottom, you have several options that allow you to:
Delete
Print the summary document with all check-in information
Save, if you have made any changes
Check-out or exit
Cancel or exit without saving
When the stay ends, and the animal leaves the hotel/daycare, the check-out is done.
You can check-out in two ways:
In the View check-in list
and within an check-in
Using the button Check-out
When you click the button, you will see several options:
Check-out and invoice
or check-out and pay at the PetShop, to add other products or services
or just check-out (to invoice later)
Choose the one you prefer.
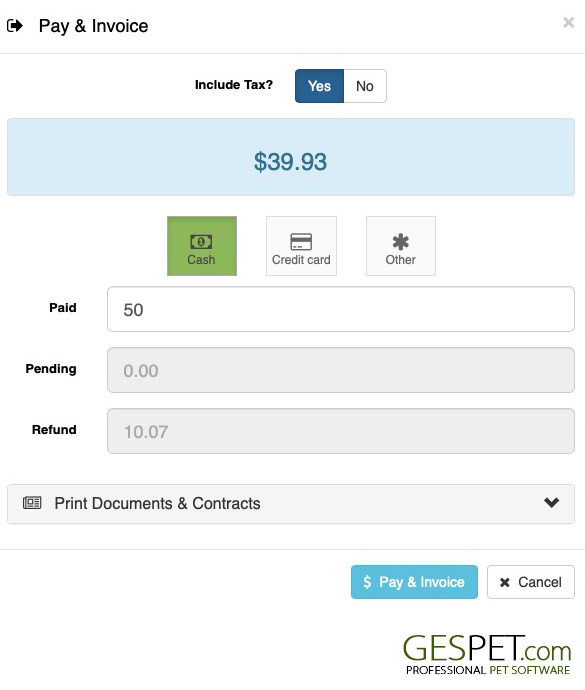
By clicking on the Check-out button, a pop-up window appears:
Select whether to generate the sale with or without taxes
And if you want to create a full or simplified invoice
The remaining amount to be paid is displayed
Enter the amount they pay you
Select the payment method (Cash, card, etc.). If you click on "Other," the rest of your payment methods will appear, allowing you to select the appropriate one.
If the customer will be using multiple payment methods, select the Mixed Payment option to add 2 or more payments, for example, paying 20€ using a card and 30€ using cash (money).
You can configure other payment methods in the Settings > Payment Methods option.
Click on Check-out
The invoice or sales document appears, and you can:
Edit what you need: payment date, invoice number, etc.
Print it
Delete it
Send it by email (and have it sent to you by email if you want)
If not fully paid (for example, the total is $200 and they paid $180), the invoice will be marked as "pending" and will appear in the Report > Unpaid Invoices.
A pop-up window will appear to confirm that you want to check-out.
The PetShop software has been opened, and the hotel/daycare accommodation has been added to the ticket.
You can add products and services to invoice them together.
If you want to add products, select them by clicking on them
If you want to add services, click on the Invoice service option (for example, veterinarian), and all pending veterinary consultations to be invoiced will appear.
You can view the service and add it to the ticket.
The service will be closed or finished. By clicking Pay, the sale is
completed, and the invoice is generated.
Refer to the sales screen
help guide for more information
A pop-up window will appear to confirm that you want to check-out.
If you click, the check-out is done, and a confirmation appears to indicate whether the check-out was successful.
If the check-out is successful, you can:
Simply close this window and continue with other tasks
View the summary document of the check-out by clicking the View Details.
At the bottom, there are buttons with which you can:
Delete
Print the summary document
Save, if you have made any modifications
invoice and invoice here
or invoice and invoice in the PetShop, to add other products and services
You can select the option Charge In PetShop, which allows you to charge for the service in the petshop software:
Independently, only for this service.
Together with other services, for example, grooming or training.
Together with products.
Together with products and other services.
Internally, for your statistics, Gespet will record the portion
corresponding to each business area.
This way, you can determine how much you have earned/billed for each
business area and
for each product and service, even if they are sold together.
There may be some special situations, which we will explain with examples:
SITUATION 1. A pet hotel that accepts payments throughout the stay
In the case of long stays or for customers with previous unpaid bills, this pet hotel wants to collect a certain amount, for example, at the end of each month, instead of charging the full amount at the beginning or end of the stay.
The duration is, for example, 4 months, and the estimated amount is, for example, $560. The customer will pay $100 at the end of each month and the remaining amount at the end of the stay.
How can this be managed?
When the customer makes the payment, access that entry.
In the Advances option, record the $100 payment.
Repeat this process for the remaining payments.
When checking this stay, you will see the paid and pending amounts. Also, in the Pending to Invoice report.
At the end of the stay, perform the checkout, charge, and invoice. You will see that the customer paid, for example, $300, and $260 are pending.
If the customer pays the pending amount (€260), the complete stay will be paid, and the invoice will have a Paid status.
If not, the invoice will be pending. Continue reading the next case.
SITUATION 2. A customer does not pay the full invoice amount
It may happen that only part of the total service amount is charged. For example, the stay amount is €300, but when checking out, the customer only pays €200, leaving €100 pending.
This may be because the customer intends to pay that amount later or with another payment method, etc.
If you have already completed the check-out, charged, and invoiced (as in the previous case), and after a few days, the customer pays the pending amount:
In the View > Sales option, select the invoice. You will see that it has a Pending Payment status.
In the Advances section, record the amount the
customer pays and click Save.
The invoice status:
If it is the total remaining amount, the invoice now has a Paid status.
If more money is still due, the invoice remains Pending.
If, at the end of the customer's stay, you complete the check-out but do not want to charge and invoice yet because you will do so later or when the customer pays the full amount:
You can only perform the check-out (without charging or invoicing).
In the Advances option, record the amount the
customer pays and click Save.
When you are ready to charge/invoice, in View > Check-outs, select that Check-out and click on the Charge and Invoice option to generate the invoice.
Reports for download and printing
Reports > Pending invoicing: After the check-out, the payment and invoice are made. But meanwhile, you can see the money that has not yet been collected but will be invoiced when the check-out is made.
EXPORT INFORMATION .XLS FORMAT
(Settings
> Data Management)
Check-outs
IF YOU HAVE MADE A MISTAKE, AND YOU NEED TO MODIFY THAT INVOICE
Issued invoices cannot be deleted or modified, as tax law strictly prohibits doing so.
What can you do if you’ve made a mistake?
If you issued an invoice and, for instance, selected the wrong customer, you can’t just delete it and create a new one, nor can you edit it to change the customer. But don’t worry — there’s a proper way to fix it.
To correct it, you simply need to issue a corrective invoice (also known as a credit note). This special type of invoice is used to rectify any errors made in a regular invoice.
The credit note (or corrective invoice) cancels the original one. Credit notes can have their own numbering sequence, separate from regular invoices. You can configure the numbering format you prefer for both invoices and credit notes, and Gespet will automatically increase the numbering by one each time a new one is created, ensuring all are consecutive.
Neither invoices nor credit notes can be deleted. Once an invoice has been canceled through a credit note, that credit note cannot be deleted or undone.
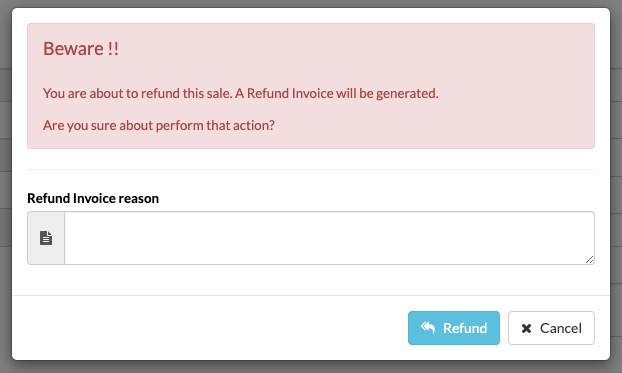
This process is irreversible. That’s why, when you click the Cancel button, the system doesn’t immediately proceed — instead, a red pop-up warning appears to confirm your action. You must confirm once again that you want to continue. In other words, there’s a double confirmation step to avoid issuing a credit note by mistake.
The correction (credit note or corrective invoice) is done in two steps:
Cancel the original invoice and generate the corrective invoice or credit note with negative amounts.
Create the new invoice, which now contains the correct information.
If the customer’s information is incorrect and you need to issue a corrective invoice to fix it, you can do it in two ways:
Option 1: If you need to correct the details before generating the corrective invoice:
First, go to the customer’s profile, update the information, and click Save.
Now you can issue the corrective invoice or credit note, which will include the new details you just updated in the customer’s profile. In the “reason for cancellation” field, if you wish, you can explain the reason — in this case, the correction of incorrect data.
When you generate the new invoice, it will include the updated information.
Option 2: If you don’t need to correct the details before generating the corrective invoice:
Generate the corrective invoice. It will contain the same customer information as the original. In the “reason for cancellation” field, if you wish, you can indicate the reason — in this case, the incorrect data.
Then go to the customer’s profile, update the necessary details, and click Save.
When you generate the new invoice, it will include the corrected details.
When a corrective invoice or credit note is issued, it automatically cancels the original invoice, payment, and the associated stay/service/sale. To register that stay/service/sale again, you’ll need to re-enter it and complete it. Once it’s finalized, you can issue the new payment/invoice.
Re-entering the stay/service/sale won’t create duplicates — the previous one was already canceled when the credit note was generated.
Let’s look at an example:
Let’s say you accidentally selected Michael Johnson as the customer, but the correct one was Michael Jackson, and you already issued the invoice. How can you fix it?
If you notice the mistake while invoicing, or later by going to View > Sales, select the invoice in question and click on it.
Click the Cancel button to issue a credit note.
You can write down the reason for the credit note — for example, “wrong customer information.”
In compliance with current legislation, this corrective invoice will include references to the original invoice being corrected (its number and date), and you can specify the reason for issuing it.
It will follow the numbering format you’ve configured.
You can print or email it if you wish.
Now you can register the stay/service/sale again, making sure you select the correct information. Once it’s completed, you can generate the payment/invoice with all the correct data.
An invoice will always show the date on which it was issued, as the issue date is legally fixed and cannot be altered.
This means it’s not legally allowed to issue an invoice with an earlier or later date, nor to change the date afterward. For example, if you create it today, it will show today’s date.
At the end of the stay, the check-out is performed. Here you can see a list of all check-outs.
You can search using the search bar at the top and sort as you like by clicking on the table's title.
More information on ordering and search engines:
Click hereBy clicking on a check-out, you can view the details and also print the summary document of the check-out, delete it (if it has not been invoiced yet), and invoice it if it was pending.
There are several ways or accesses to create a new check-out, that is, to end the accommodation of an animal:
Option 1: At the entrance, at the bottom, by clicking on the button
Option 2: In view entries > by clicking on the button
In any case, the process is the same. It is about finalizing the accommodation of the animal. You can:
Check-out, and invoice directly.
Check-out to charge in-store (you can add products and other services)
Only check-out the animal, to invoice later
Click on the button Check-out, charge, and invoice.
Review all the information, concepts, customer data, etc., and click on charge and invoice.
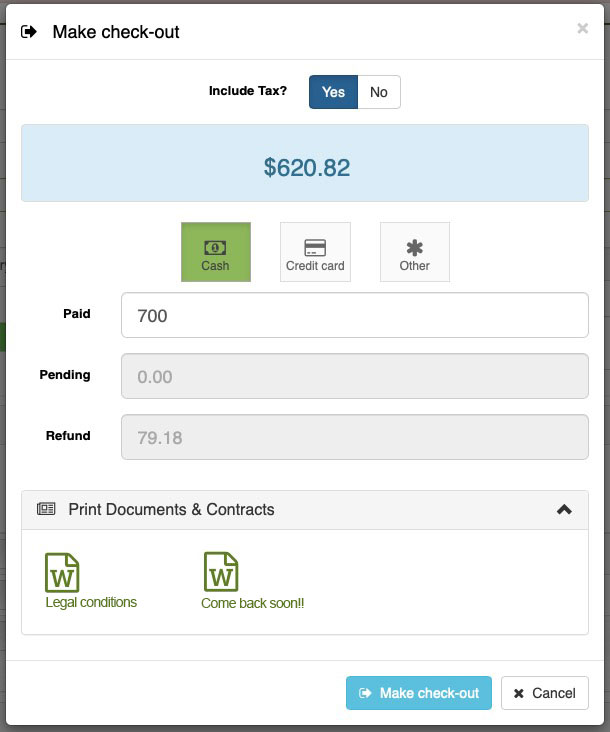
A pop-up window opens
If that invoice is tax-exempt, select the option (Taxes = NO), and the invoice is generated without taxes.
Select the payment method (You can configure all the payment methods you want).
Enter in "Paid" the money the customer gives you, and the calculator automatically shows if there is a shortage ("pending") or extra money ("Return").
You can print the necessary documents/contracts.
Upon completion, the sale and invoice are automatically generated, and you can print and send it by email.
If you want to add products or services to charge them collectively, you just need to click on the option
And then:
The petshop module will open
The stay has already been added to the ticket
By clicking on the products, you can add the ones you want
By clicking on the Charge service option, you can add services from your grooming, training, veterinary, ...
The customer is already automatically selected
Now you just need to finalize the sale
Internally, for your statistics, the software will record the sale according to business areas. That is, if the sale includes, for example, products + accommodation, it will record how much money corresponds to each business area, so that later you can know how much money you have earned with your grooming, hotel, product sales, ...
How to sell products + services together?
Keep reading Keep readingIf you want to check-out but cannot invoice yet,
you just have to click on the button
This will be very useful if, for example, the client has not yet come to pick up the animal and pay for the service, or if you are going to deliver it to their home and charge them for the accommodation at that moment. If the staff in charge of the animals records the check-out in the software and later the clients at the cash desk/reception pay for the stay, etc. You can already register the check-out and free up the room.
To later proceed with the payment and invoice, go to the option View > Check-outs >
Select it and click on the button
to finalize, you just have to
follow the same steps as in case 1.
You can view all the automatic reminders and you can filter by status or see them all:
Sent: They have been sent.
Scheduled:They are scheduled to be shipped on the selected date and time.
It's not possible to edit a reminder, but you can cancel it and create a new one.
If you want to cancel a reminder scheduled so that it's not sent, click on that reminder and click CANCEL.
Canceled: You have canceled the shipment and they will not be sent.
Error: They could not be sent because an error has occurred.
At the time of sending the reminder to the customer, the software checks the credit of available emails. If there is no credit available, the reminder will not be sent and in the status you will see Error and the reason "You do not have credit to send more emails".
More information about email consumption (limits on sending emails):
Click hereIf you want to see which appointment this reminder corresponds to , just click on the link Grooming/Hotel/Nursery/Training Appointment/booking and the appointment will open in a tab new.

More information about automatic reminders:
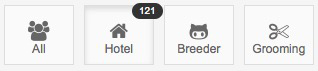
Click hereList of all animals. If you have multiple business areas, customer data is accessible from all of them, but animals are categorized by business area. You can consult them all or by business area (for example, only the Grooming animals).
A small indicator displays the total number of animals.
At the top of the screen, there is a search bar. If you enter information and press enter or click on the magnifying glass, all matches will be displayed
You can sort the list as you need:
More information on ordering and search engines:
Click hereTo add animals, you have two options:
Add them individually (one by one) using the Add option.
Or add multiple animals at the same time using the Import option.
To add them, use the buttons at the top:
Click the Add New button, fill in the information, and click Save.
(Refer to the New > Customer section for more
information)
Or click the Import button and follow the instructions.
How to import animals in bulk in the software
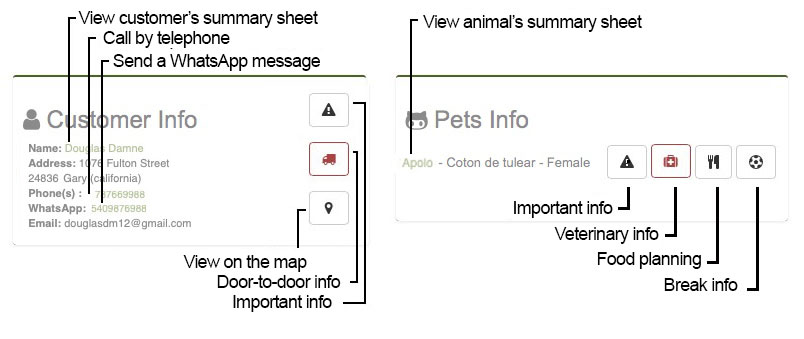
Click hereIf you click on a pet, all the information about them will appear. The Magic Desk is displayed, which is a summary screen or card with all the animal's information.
At the top, there are 2 buttons:
Show/hide the right sidebar menu to expand the workspace
Acciones rápidas o "atajos" y Acciones adicionales
Quick actions or "shortcuts" and Additional actions
Send Summary Sheet by Email
Print Summary Sheet
HOTEL |
New Booking and New check-in in the hotel |
GROOMING |
New Appointment and New grooming service |
DAYCARE |
New Booking and New check-in in daycare |
BREEDING |
New Puppy Sale |
TRAINING |
New Appointment, New Training/Education Session, and Sell Course |
VETERINARY |
New Appointment, New Veterinary Consultation |
Interactive graphs, which display a summary of the most important information (revenue, profitability, etc.). This information varies depending on the software you are using.
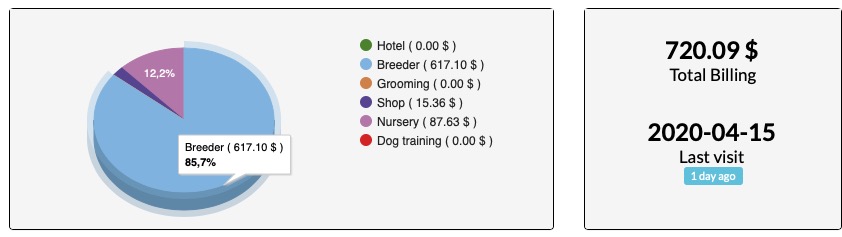
These intelligent statistics help you have a clear view of the activity, profitability, and loyalty of that customer "at a glance."
PET HOTEL APP
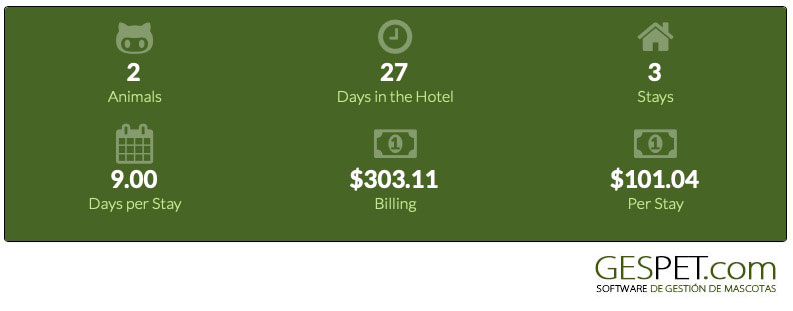
Number of days the animal has stayed in your hotel
Number of stays or accommodations in your hotel
Average days per stay
Total billing of those stays
Average billing per stay
PET GROOMING APP
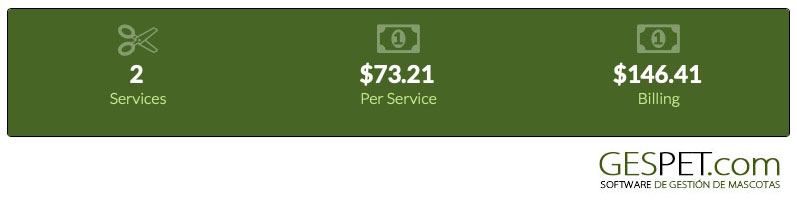
Number of grooming services for that animal
Total invoicing of that animal in grooming services
Average price of the grooming services
PET TRAINING APP
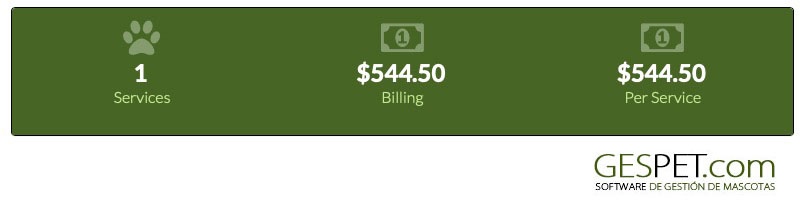
Number of training/education services for that animal
Total invoicing of that animal in training/education services
Average price of the training/education services
PET NURSERY APP
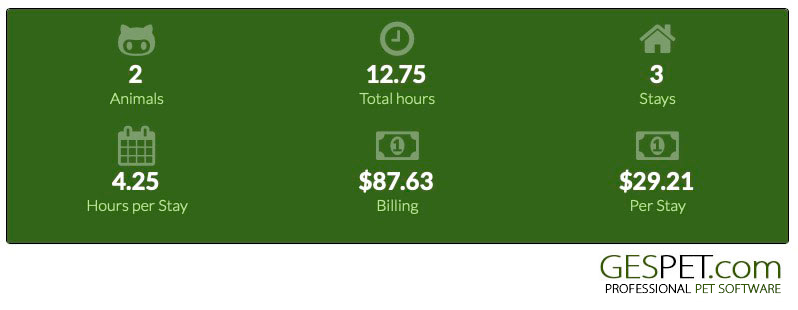
Number of hours the animal has stayed in your hotel
Number of stays or accommodations in your hotel
Average hours per stay
Total billing of those stays
Average billing per stay
PET SHOP APP
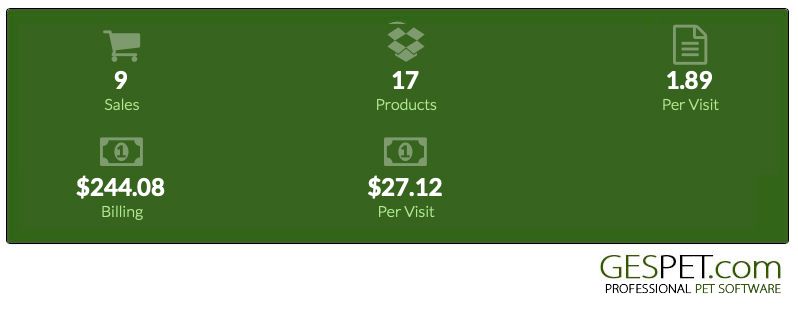
Number of sales
Total products sold
Average products sold per store visit (per purchase made)
Total revenue (total money spent)
Average revenue per visit (average money spent per purchase made)
VETERINARY APP
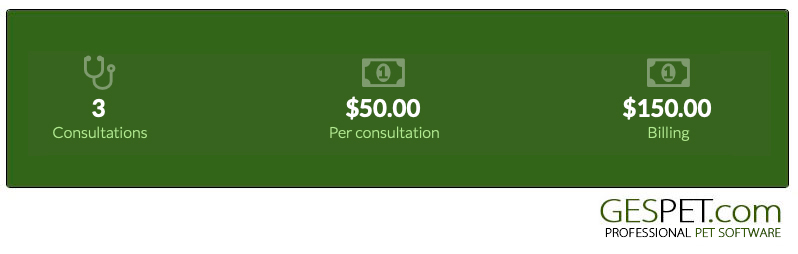
Number of veterinary consultations performed on their animals
Total revenue in veterinary services (total money spent)
Average price of the consultations performed
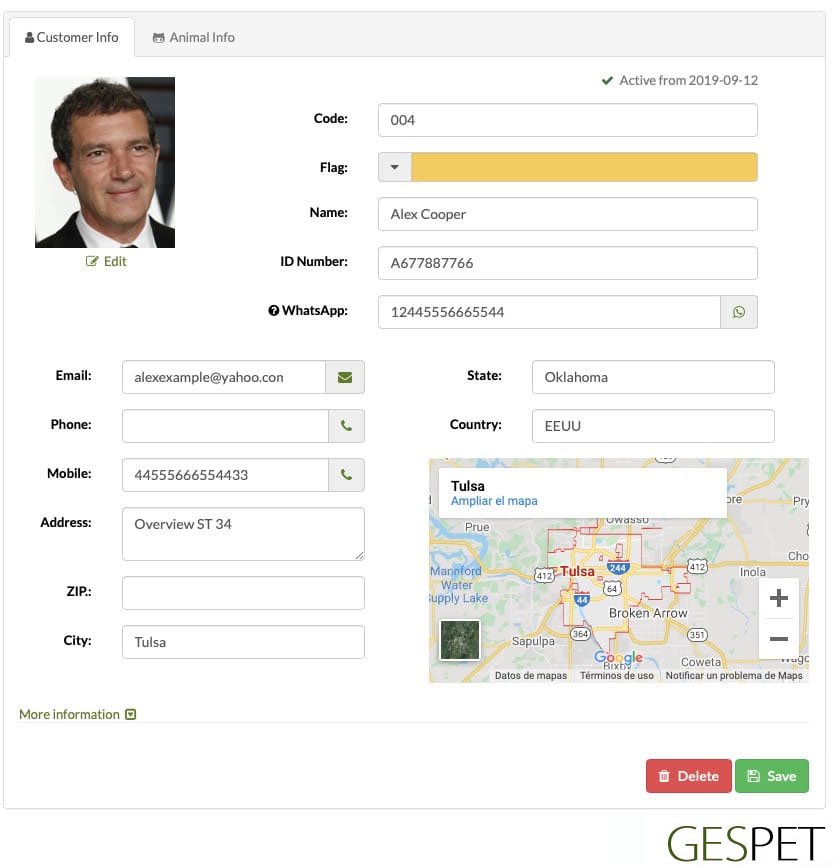
In this option, you can both view and directly modify the information. Remember that if you make any changes, you need to click the Save button to save that new information.
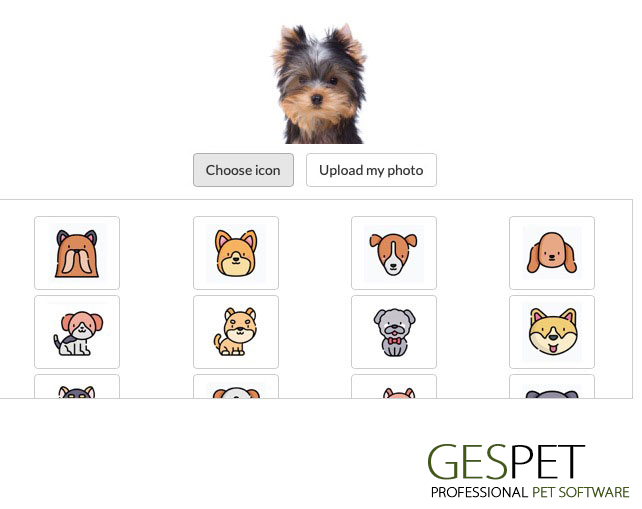
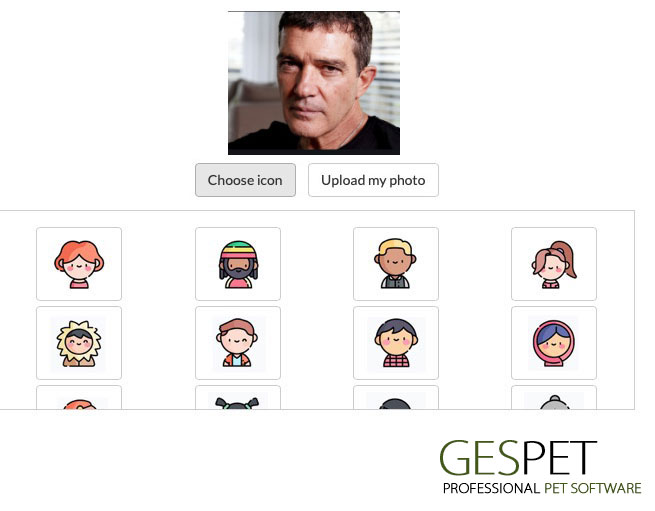
You can upload a photo form your device or select an icon or avatar from the database with more than 100 avatars available to choose from.
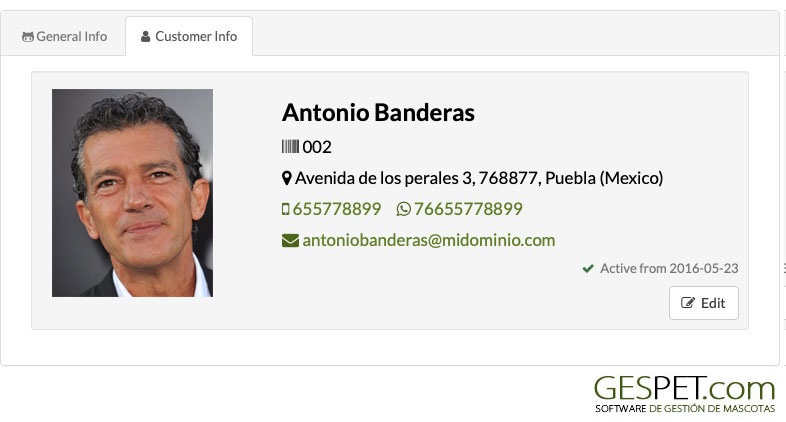
You can view the data of the associated client and access the customer's profile directly.
There are fields where you can add important or highlighted information about the customer and the animals:
Important Information
Pick-up and Delivery Information
Notes or Comments
This information will appear when you work with this customer/animal, for example, when you record a new reservation. This way, you can quickly access the relevant information.

Delete: If the animal has data referenced in other parts of the software, such as associated animals, sales or invoices, reservations/appointments, check-ins/outs/services, etc., they cannot be deleted directly. Deleting them would cause errors in the rest of the software because those invoices, animals, reservations/appointments, etc., would no longer be associated with any animal.
For this reason, if you want to delete them, you must first remove the data they have referenced before you can delete them.
If you've been testing the software and entering fictitious data, and now that you've finished the testing phase, you want to delete all the data to start working with the software using real data, we can do it. We can permanently remove all this data from the software. Contact us, and we will assist you.
Deactivate: Our recommendation is that instead of deleting, you mark them as inactive or "Inactive." This way, you can continue to consult the records of that animal and all their related information.
To mark a animal as Inactive: In the option View > Animals,
select the animal > Click on More Information > Inactive =
yes.
You can also add the date and more details about the reason for inactivity.
If you mark an animal as inactive:
When you check the list of animals (View > Animals), you'll see that they have the symbol , while the rest have the icon .
In their file, you'll see "inactive since date x."
They will no longer appear when you search to make a new booking/appointment, service/check-in, etc.
In the side menu, there are more options available depending on the software you are using:
Documents: You can store and access documents related to that pet, such as contracts, documentation, etc. Supported file types include:
.xls, .xlsx, .doc, .docx, .odt, .ods, .pdf, .rtf, .txt, GoogleDrive Document, and GoogleDrive spreadsheet
Maximum file size: 2 MB
Alerts: You can make and check important reminders for a pet, and the application will automatically remind you of them.
Training
Training Services: You can view the training/education services sold to this client
Sales: Training sales or invoices made to this customer
Sessions and Progress: You can view/add training/education sessions for this animal and assess its progress
Print Certificate: If you want to award certificates to your customers and animals to motivate and reward their efforts, you can do it conveniently from this option
Courses: Courses in which this animal is enrolled
Grooming
Grooming Appointments: You can view all scheduled grooming appointments for this animal
Grooming Services: List of all grooming services performed on this animal
Hotel
Bookings: You can view all reservations planned for animals of this customer
Accommodations or Stays in the Hotel: List of all accommodations for this animal
Daycare
Bookings: You can view all reservations planned for this customer
Accommodations or Stays in the Daycare: List of all accommodations for this animal
Veterinary
Appointments: You can view all appointments scheduled for this animal
Consultations: List of all veterinary consultations for this animal
Tests: Veterinary tests conducted for this customer
Prescriptions: Veterinary prescriptions issued for this client
Physiological Parameters: Record of the physiological parameters of this animal
Weights: Record of the weights of this animal
Vaccination Control: Record of vaccines administered to this animal
Vet History: Complete veterinary history or record of all actions in chronological order
Animal Report
Profitable Animals Report
Animals
Breeding Animals (Breeding Software)
List of all customers. If you have multiple business areas, customer data is accessible from all of them, but customers are categorized by business area. You can consult them all or by business area (for example, only the Grooming customers).
A small indicator displays the total number of customers.
At the top of the screen, there is a search bar. If you enter customer information and press enter or click on the magnifying glass, all matches will be displayed
You can sort the list of customers as you need:
More information on ordering and search engines:
Clic hereYou can deactivate or mark a customer as "Inactive." When deactivated,
their data is not deleted, just hidden.
The Administrator can view the information of deactivated customers,
but those customers are not accessible to Users.
To add customers, you have two options:
Add them individually (one by one) using the Add option.
Or add multiple contacts at the same time using the Import option.
To add them, use the buttons at the top:
Click the Add Customer button, fill in the information, and click
Save.
(Refer to the New > Customer section for more
information)
Or click the Import button and follow the instructions.
How to import customers in bulk in the software
Click here How to import customers in bulk in the softwareIf you click on a customer, all the information about them will appear. The Magic Desk is displayed, which is a summary screen or card with all the customer's information.
At the top, there are 2 buttons:
Show/hide the right sidebar menu to expand the workspace
Quick actions or "shortcuts" and Additional actions (varies depending on the software you are using)
Send Summary Sheet by Email
Print Summary Sheet
Add a new animal for this customer
HOTEL |
New Reservation and New check-in in the hotel |
GROOMING |
New Appointment and New grooming service |
DAYCARE |
New Reservation and New check-in in daycare |
BREEDING |
New Puppy Sale |
TRAINING |
New Appointment, New Training/Education Session, and Sell Course |
STORE |
New Sale |
VETERINARIAN |
New Appointment, New Veterinary Consultation |
Interactive graphs, which display a summary of the most important information (revenue, profitability, etc.). This information varies depending on the software you are using.
These intelligent statistics help you have a clear view of the activity, profitability, and loyalty of that customer "at a glance."
PET HOTEL APP
Number of days the animal has stayed in your hotel
Number of stays or accommodations in your hotel
Average days per stay
Total billing of those stays
Average billing per stay
PET GROOMING APP
Number of grooming services for that animal
Total invoicing of that animal in grooming services
Average price of the grooming services
PET TRAINING APP
Number of training/education services for that animal
Total invoicing of that animal in training/education services
Average price of the training/education services
PET NURSERY APP
Number of hours the animal has stayed in your hotel
Number of stays or accommodations in your hotel
Average hours per stay
Total billing of those stays
Average billing per stay
PET SHOP APP
Number of sales
Total products sold
Average products sold per store visit (per purchase made)
Total revenue (total money spent)
Average revenue per visit (average money spent per purchase made)
VETERINARY APP
Number of veterinary consultations performed on their animals
Total revenue in veterinary services (total money spent)
Average price of the consultations performed
If the customer has any unpaid invoice, an alert box with the information will be displayed. Clicking on the icon will open the invoice for you to review.

This message about unpaid invoices will also appear before making a new reservation/ appointment/service....
In this option, you can both view and directly modify the information. Remember that if you make any changes, you need to click the Save button to save that new information.
Furthermore, by using the quick access buttons, you can call or open WhatsApp to chat with them; click on the corresponding icon (phone, WhatsApp, etc.).
You can upload a photo or select an icon from the avatar database
This section involves critical actions. If your business has multiple users, we highly recommend restricting access to this area.
Delete a Customer:
This option is exclusively available to Administrators and is not accessible to Users.
By selecting the option to delete this customer, all associated information will be permanently removed, including but not limited to:
Personal and contact details. Data protection information.
Invoices. Check-ins, check-outs, consultations, training sessions, and grooming services.
Animals. Pedigrees. Breeding-related data: litters, puppies, weights, etc.
Bookings and appointments, including online reservations and appointments.
Documents and contracts. Veterinary prescriptions. Attachments. Images.
Communications.
And any other information related to this customer.
Before proceeding with the deletion, we strongly advise ensuring that there are no legal obligations to retain specific information for a set period due to tax or accounting regulations.
Additionally, please note that if necessary, you can download the required information BEFORE continuing, as this deletion process is PERMANENT and data cannot be recovered once deleted.
Clicking the Delete button will trigger immediate data removal.
If you’re unsure about legal retention requirements or have any other concerns, consult with a lawyer or a data protection expert to ensure compliance with all relevant regulations.
If your business involves multiple users, we recommend using the security and access control module to restrict this option for unauthorized personnel.
Deactivate:
You can deactivate or mark a customer as "Inactive." When deactivated,
their data is not deleted, just hidden.
The Administrator can view the information of deactivated customers,
but those customers are not accessible to Users.
Select customer > from the right-hand menu Privacy > Deactivation =
yes.
You can add a date and further details about the reason for deactivation.
If you mark a customer as inactive:
When you check the list of customers (View > Customers), you'll see that they have the symbol , while the rest have the icon .
In their file, you'll see "inactive since date x."
They will no longer appear when you search to make a new reservation/appointment, service/check-in, etc.
You can see the animals associated with the customer and access their animal profiles directly
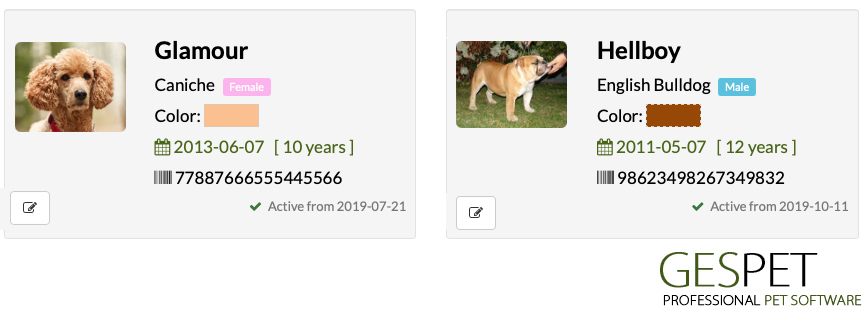
By clicking on the Animal Data tab, you will see the associated
animals, and by clicking on one of them, you can access their profile.
Highlighted Information
There are fields where you can add important or highlighted information about the customer and the animals:
Important Information
Pick-up and Delivery Information
Notes or Comments
This information will appear when you work with this customer/animal, for example, when you record a new reservation. This way, you can quickly access the relevant information.
In the side menu, there are more options available depending on the software you are using:
Documents: You can store and access documents related to that customer, such as contracts, documentation, etc. Supported file types include:
.xls, .xlsx, .doc, .docx, .odt, .ods, .pdf, .rtf, .txt, GoogleDrive Document, and GoogleDrive spreadsheet
Maximum file size: 2 MB
Reminders: You can make and check important reminders for a customer, and the application will automatically remind you of them.
Privacy: Here, you can manage all information related to privacy/GDPR.

Training
Training Services: You can see the training/education services sold to that customer.
Sales: for training services made to that customer.
Grooming
Grooming Appointments: You can see all the appointments scheduled for that customer.
Grooming Services: A list of all grooming services performed on the animals of that customer.
Sales: for grooming services made to that customer.
Hotel
Bookings: You can see all the reservations scheduled for the animals of that customer.
Hotel Stays: A list of all the accommodations for the animals of that customer in your hotel.
Sales: for hotel services made to that customer.
Daycare
Bookings: You can see all the reservations scheduled for that customer.
Daycare Stays: A list of all the stays for the animals of that customer in your daycare.
Sales: for daycare services made to that customer.
PetShop
Sales: for store purchases made by that customer.
Breeding
Sales: for breeding services made to that customer.
Veterinarian
Appointments: You can see all the appointments scheduled for the animals of that customer.
Consultations: A list of all veterinary consultations made for the animals of that customer.
Sales or Invoices: for veterinary services made to that customer.
Customer Report
Customer Address Report
Profitable Customers Report
Customers
Customer Addresses
List of all suppliers. If you have multiple business areas, suppliers data is accessible from all of them, but suppliers are categorized by business area. You can consult them all or by business area (for example, only the Grooming suppliers).
A small indicator displays the total number of suppliers.
At the top of the screen, there is a search bar. If you enter supplier information and press enter or click on the magnifying glass, all matches will be displayed
You can sort the list of suppliers as you need:
More information on ordering and search engines:
Clic hereTo add suppliers, you have two options:
Add them individually (one by one) using the Add option.
Or add multiple contacts at the same time using the Import option.
To add them, use the buttons at the top:
Click the Add New button, fill in the information, and click Save.
(Refer to the New > Customer section for more
information)
Or click the Import button and follow the instructions.
How to import suppliers in bulk in the software
Click here How to import suppliers in bulk in the softwareIf you click on a supplier, all the information about them will appear. The Magic Desk is displayed, which is a summary screen or card with all the supplier's information.
At the top, there are 2 buttons:
Show/hide the right sidebar menu to expand the workspace
Quick actions or "shortcuts" and Additional actions
Send Summary Sheet by Email
Print Summary Sheet
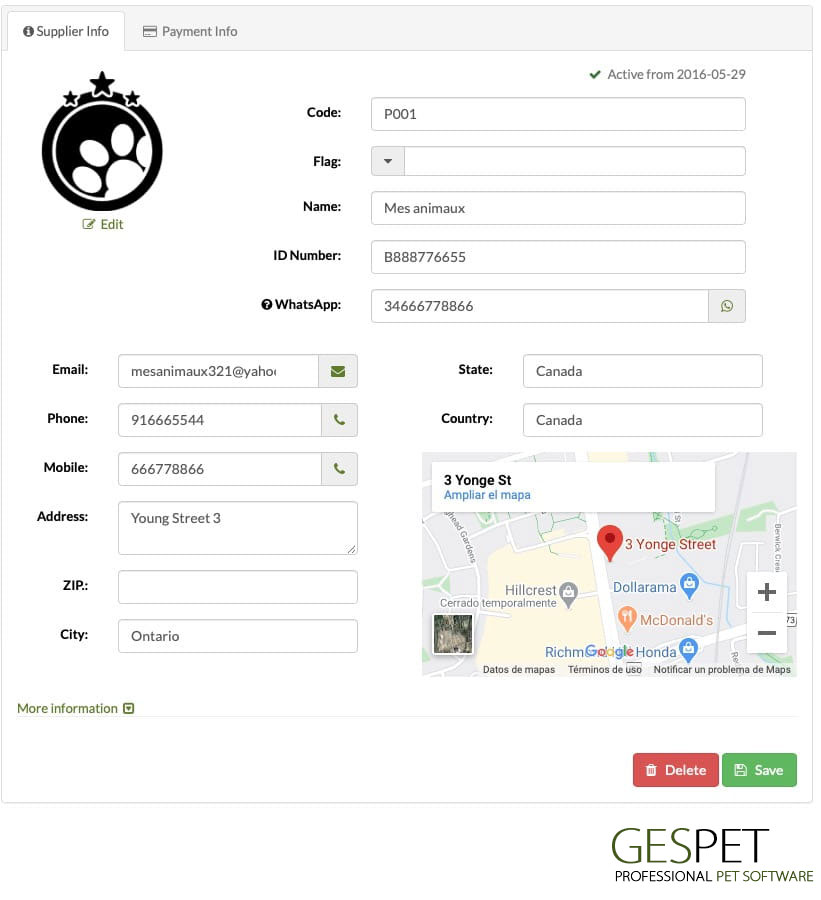
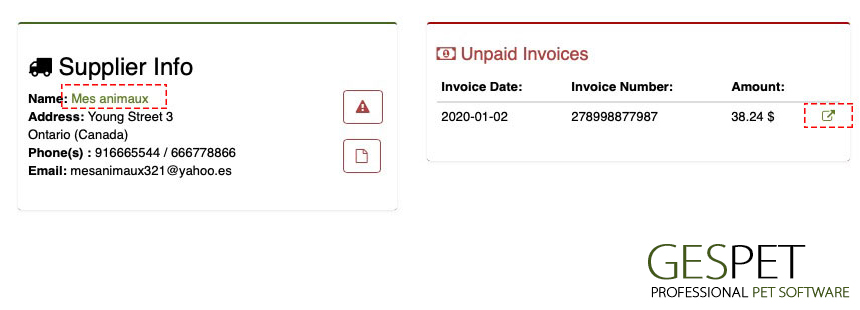
You can see statistics with the total number of purchases made to this supplier and the total amount of those purchases.
If the customer has any unpaid invoice, an alert box with the information will be displayed. Clicking on the icon will open the invoice for you to review.
In this option, you can both view and directly modify the information. Remember that if you make any changes, you must click the Save button to save that new information.
Furthermore, using the quick access buttons, you can call or open WhatsApp to chat with them; click on the corresponding icon (phone, WhatsApp, etc.).
Delete: If the supplier has data referenced in other parts of the software, such as orders, purchases, etc., they cannot be deleted directly. Deleting them would cause errors in the rest of the software because those purchases, orders, etc., would no longer be associated with any supplier.
For this reason, if you want to delete them, you must first remove the data they have referenced before you can delete them.
If you've been testing the software and entering fictitious data, and now that you've finished the testing phase, you want to delete all the data to start working with the software using real data, we can do it. We can permanently delete all this data from the software. Contact us, and we will assist you.
Deactivate: Our recommendation is that, instead of deleting, you mark them as inactive or "Inactive." This way, you can continue to consult the records of that supplier and all their related information.
To mark a supplier as Inactive:
If you mark a supplier as inactive:
When you check the list of suppliers (View > Suppliers), you'll see that they have the symbol , while the rest have the icon .
In their profile, you'll see "Inactive since date x."
They will no longer appear when you search to make a new order, purchase, etc.
In the side menu, there are more options available depending on the app you are using:
Documents: You can store and access documents related to that supplier, such as contracts, documentation, etc. Supported file types include:
.xls, .xlsx, .doc, .docx, .odt, .ods, .pdf, .rtf, .txt, GoogleDrive Document, and GoogleDrive spreadsheet
Maximum file size: 2 MB
Reminders: You can make and check important reminders for a supplier, and the application will automatically remind you of them.
Privacy: Here, you can manage all information related to privacy/GDPR.
Suppliers
Suppliers
List of all veterinary contacts. If you have multiple business areas, suppliers data is accessible from all of them, but contacts are categorized by business area. You can consult them all or by business area (for example, only the vet contacts for hotel).
A small indicator displays the total number of suppliers.
At the top of the screen, there is a search bar. If you enter contact information and press enter or click on the magnifying glass, all matches will be displayed
You can sort the list of contacts as you need:
More information on ordering and search engines:
Clic hereTo add contacts, you have two options:
Add them individually (one by one) using the Add option.
Or add multiple contacts at the same time using the Import option.
To add them, use the buttons at the top:
Click the Add New button, fill in the information, and click Save.
(Refer to the New > Customer section for more
information)
Or click the Import button and follow the instructions.
How to import contacts in bulk in the software
Click hereIf you click on a contact, all the information about them will appear. The Magic Desk is displayed, which is a summary screen or card with all the contact's information.
At the top, there are 2 buttons:
Show/hide the right sidebar menu to expand the workspace
Quick actions or "shortcuts" and Additional actions
Send Summary Sheet by Email
Print Summary Sheet
Add a new purchase made to this supplier
In this option, you can both view and directly modify the information. Remember that if you make any changes, you must click the Save button to save that new information.
Furthermore, using the quick access buttons, you can call or open WhatsApp to chat with them; click on the corresponding icon (phone, WhatsApp, etc.).
Delete: If the contact has data referenced in other parts of the software, such as orders, purchases, etc., they cannot be deleted directly. Deleting them would cause errors in the rest of the software because those purchases, orders, etc., would no longer be associated with any contact.
For this reason, if you want to delete them, you must first remove the data they have referenced before you can delete them.
If you've been testing the software and entering fictitious data, and now that you've finished the testing phase, you want to delete all the data to start working with the software using real data, we can do it. We can permanently delete all this data from the software. Contact us, and we will assist you.
Deactivate: Our recommendation is that, instead of deleting, you mark them as inactive or "Inactive." This way, you can continue to consult the records of that contact and all their related information.
<>To mark a contact asInactive: In the View > Suppliers
option, select the Contact > in the right sidebar Privacy > Inactive = yes.
If you mark a contact as inactive:
When you check the list of Contacts (View > Veterinary), you'll see that they have the symbol , while the rest have the icon .
In their profile, you'll see "Inactive since date x."
In the side menu, there are more options available depending on the app you are using:
Documents: You can store and access documents related to that supplier, such as contracts, documentation, etc. Supported file types include:
.xls, .xlsx, .doc, .docx, .odt, .ods, .pdf, .rtf, .txt, GoogleDrive Document, and GoogleDrive spreadsheet
Maximum file size: 2 MB
Reminders: You can make and check important reminders for a supplier, and the application will automatically remind you of them.
Privacy: Here, you can manage all information related to privacy/GDPR.
List of all invoices you have recorded. If you have multiple business areas, invoices are accessible from all of them, but you can view them collectively or independently (for example, only the Hotel invoices).
A small indicator with the total number of invoices is displayed.
At the top of the screen, there is a search bar. If you enter invoices information and press enter or click on the magnifying glass, all matches will be displayed
You can sort the list of invoices as you need:
More information on ordering and search engines:
Click hereSales or invoices can have 2 statuses:
Paid: If it's fully paid
Pending: If it's totally or partially unpaid
By clicking on a sale from the list, the details will appear, and you can do additional actions: print it, send it via email, or cancel it.
If you have made a mistake, and you need to "correct" that invoice:
Keep readingReports > Billing
Reports > Invoice pending
Reports > Unpaid invoices
Billling
List of all expenses or purchases you have recorded. If you have multiple business areas, expenses or purchases are accessible from all of them, but you can view them collectively or independently (for example, only the Hotel expenses).
A small indicator with the total number of expenses is displayed.
At the top of the screen, there is a search bar. If you enter expense information and press enter or click on the magnifying glass, all matches will be displayed
You can sort the list of expenses as you need:
More information on ordering and search engines:
Click hereTo add a new expense, click on the 'Add New' button icon, fill in the
details, and click 'Save'.
(Refer to the 'New > Expenses' section
if you want to see more information)
How to record expenses in the software:
Clic aquiWhen you click on an expense, the details appear.
By clicking on the supplier's name, their profile opens in a new tab.
By clicking on the supplier's icons, you can view and edit their
notes and important information.
(If they have information,
it appears in red).
If there are outstanding invoices for that supplier, they will
appear on the right-hand side.
(By clicking the small arrow
icon, you can open that unpaid invoice in a new tab).
The Report > Expenses > displays the details of expense or purchase invoices within the selected date range and for the chosen business areas. (This is useful for accounting, document preparation, or tax filing, as it provides detailed data for each invoice.)
The Report > Results > is more suitable if you prefer to view only the expenses (without the complete invoice details).
Expenses
TAGS:
online dog reservations facebook | dog hotel sales | kennel bills | planning kennel | planning animals | canine hotel planning | animal hotel software | animal planning | animal data protection | GRPD for animal business | canine hotel privacy terms | kennel privacy terms | data protection for dogs